What do you get when you take 3 mens shirts, cut them apart and sew them all together? Answer: an awesome ruffle skirt!
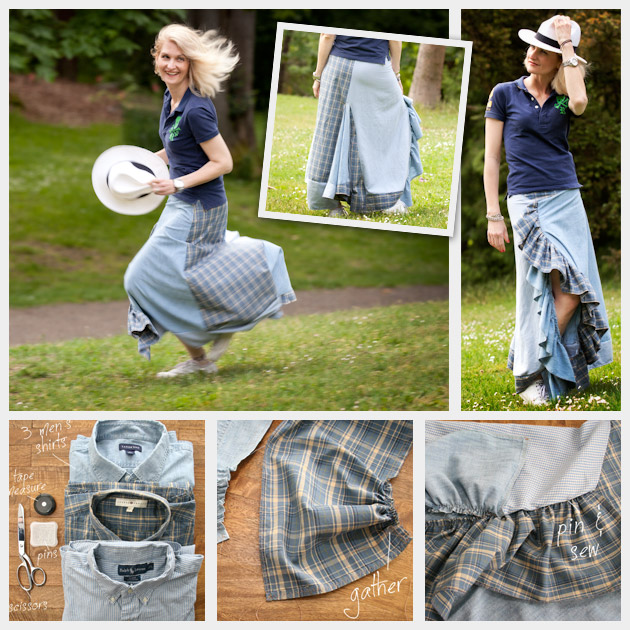 If your draping and piecing and fudging it skills are ready for the challenge, lets go!
VIEW DETAILED INSTRUCTIONS >
To see step by step instructions and photos click here.
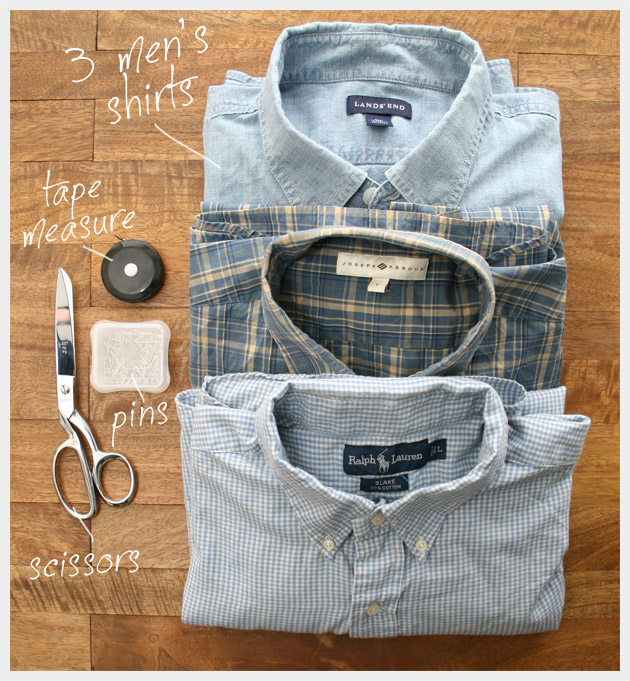
What you need to make your Recycled Ruffle Skirt DIY:
- 3 L or XL mens shirts (the bigger, the better, more fabric!)
- Scissors
- Pins
- Sewing machine
- Zipper
Step 1
Cut all 3 of your mens shirts apart at their seams. You dont need to rip the seams apart, just cut close to the seams.
Step 2
Take your 3 shirt backs, these will be the main body of your skirt, and pin them around your hips for size and shape. 2 in the back (meeting in the middle), with one of the back pieces wrapping around the front, just a bit and 1 in the front that meets the back piece right at the side seam.
This side seam is where you will want to put your zipper.
Step 3
Keeping your measurements, take your pieces off your body and pin your side seam all the way down and your back seam about half way down. Sew.
Step 4
In the back of your skirt add one of the sleeves as the extra fabric in the bottom half of the seam, pin it to your 2 back pieces in the shape of a triangle. This will give extra drape in the back of the skirt.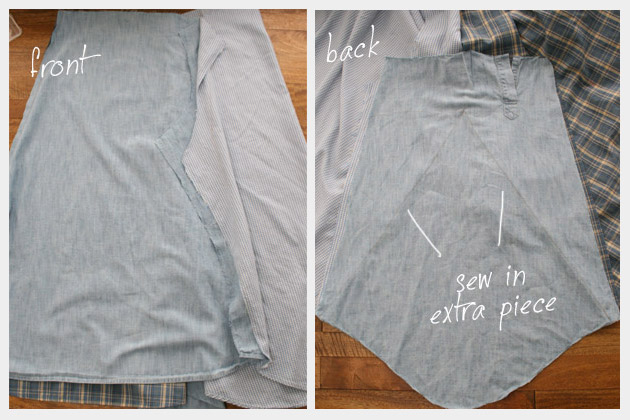
Step 5
Use 2 sleeves for your waste band. Pin one edge to each of the front and back of your skirt body. The sleeves will give you extra fabric and the slight point in the front if you want that.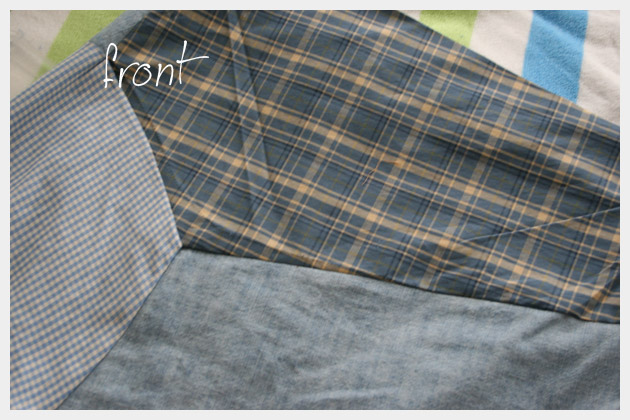

Step 6
Sew your zipper into one side of your skirt. Admittedly this wasn’t one of my better zipper achievements, so here’s a great zipper tutorial if you need one.
Step 7
Time to make your ruffle.
Take your fronts from at least 2 shirts and cut a strip out of each that is 6.5 inches wide by as long as you can make it. Sew them end to end.
Next sew a small hem in what will be your exposed edge.
You will need to make 2 separate ruffles, they will be sewn on either side of the front of your skirt.
Make one at least 18 inches longer.
Step 8
Using a very large stitch sew 2 parallel stitch lines down the opposite edge of your ruffle from your hem.
Pulling your bobbin threads very carefully, slowly gather your ruffle.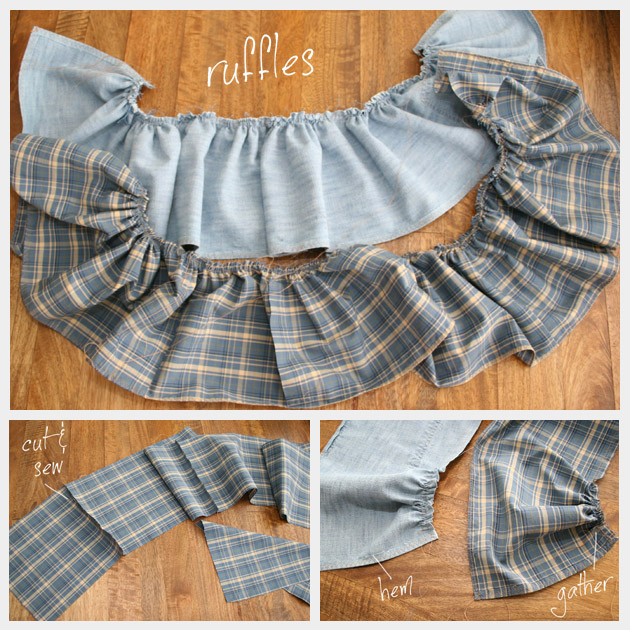
Step 8
Using a very large stitch sew 2 parallel stitch lines down the opposite edge of your ruffle from your hem.
Pulling your bobbin threads very carefully, slowly gather your ruffle.
Step 9
Pin your ruffles to your skirt.
Take your longest ruffle and start just below the front waste band and pin your ruffle between your 2 front pieces for about 10 inches and then continue it down the front part of your skirt.
Take your shorter ruffle and pin it starting at the bottom of those 10 inches and then down the opposite side of your skirt.
Sew.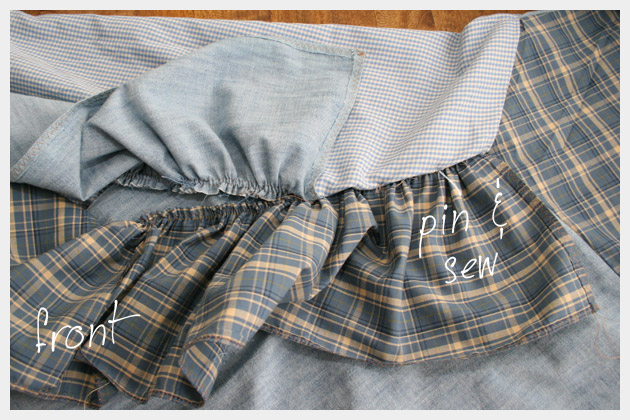
Step 10
If you want your skirt longer you can at this point add extra pieces to the bottom of your skirt. Do your best to match sizes, as you will be using up your leftover pieces of shirts.
Step 11
If you added extra pieces for length hem them and attach them to any ruffle that is hanging extra to the bottom of the skirt.
This project was one that had been mulling around in my head for awhile. I was inspired to make it, by a skirt I saw on Rugby.com.
This diy skirt was really a trial and error. I had a lot of fun making it and the desire to see it finished is what kept me going and also kept me from throwing my sewing machine out the window.
So measure twice, lay everything out and pin it make sure it is doing what you want before you sew, but most importantly have fun, get creative and make an amazing recycled ruffle skirt!
Let me know if you have any questions, Ill do my best to help.


This is so cute! You did a great job. Going to be reading this over and over. Thank you for sharing your ideas and your finished products they are really great. Fearless crafter that I see you are.