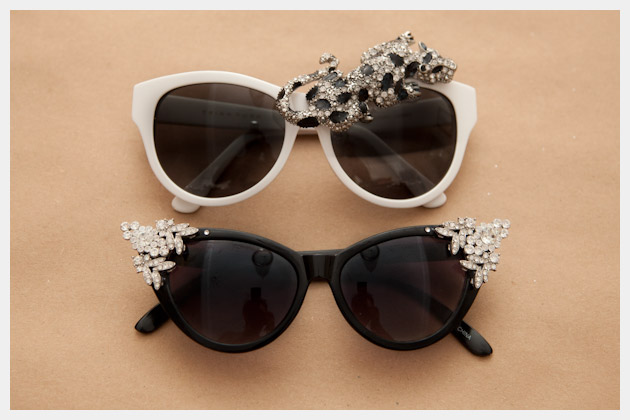
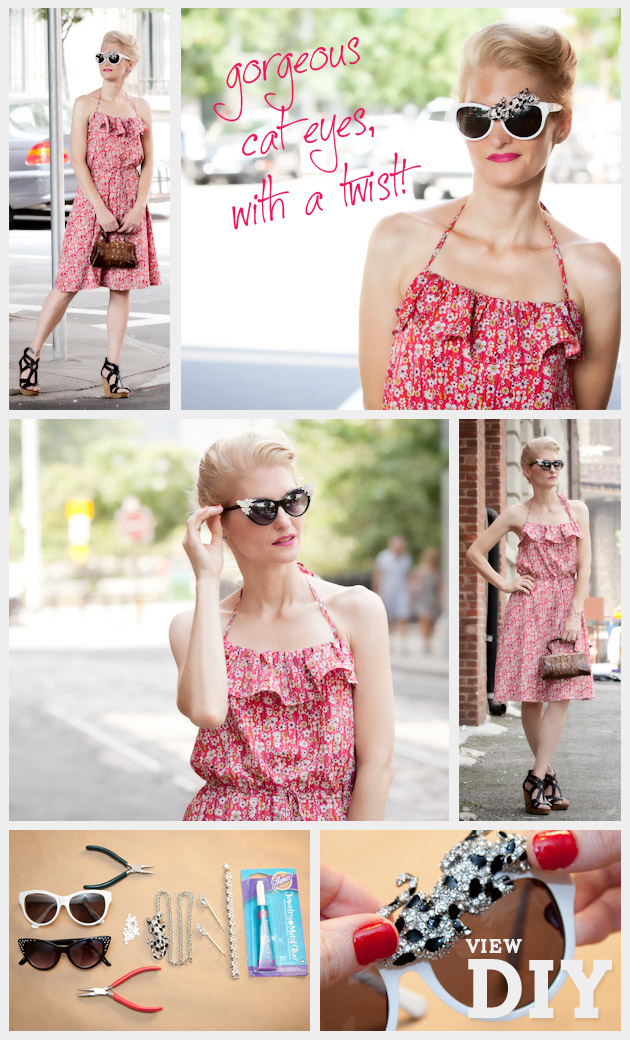
Im just so in love with all of the embellished sunglasses from the fall designer runways, theyre what inspired me to make these two versions of DIY Rhinestone Sunglasses. Both pair of sunglasses are really different and fun ways to add some personal style and sparkle to your wardrobe.
A little unexpected sparkle is ALWAYS
a good thing.
VIEW DETAILED INSTRUCTIONS >
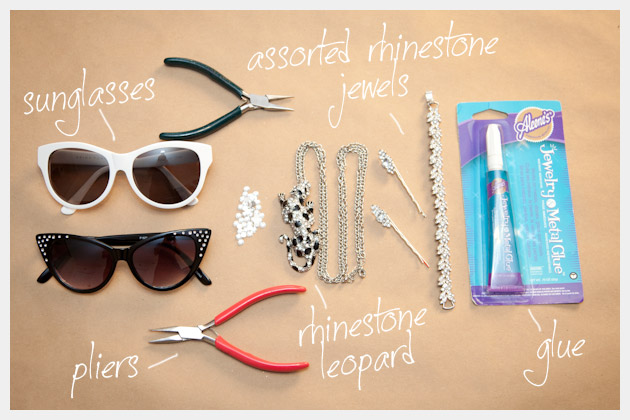
What youll need to make your DIY Rhinestone Glasses:
- 1 or 2 Pair of sunglasses (depending on which pair you make or both)
- Rhinestone leopard necklace or other large rhinestone encrusted animal (all jewelry by Forever 21)
- Rhinestone bracelet
- Rhinestone hair pins
- Pliers
- Aleenes Jewelry & Metal Glue (This stuff is amazing! It holds really well. I got mine from the wonderful people at: I Love To Create)
Rhinestone Leopard Sunglasses:
Step 1
Take your rhinestone leopard necklace and remove the chain.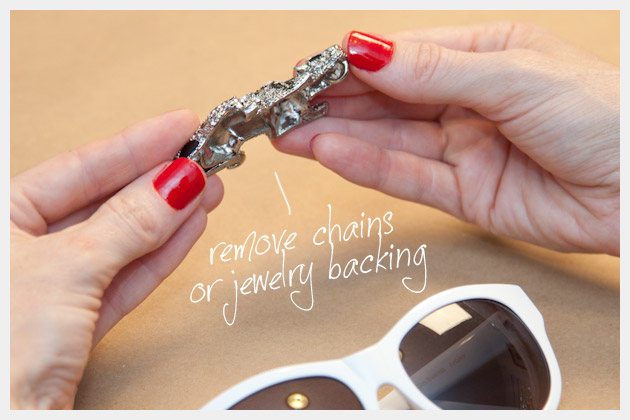
Step 2
Take your Aleenes jewelry and metal glue and place a small amount on your sunglasses on one side, where you will be placing your rhinestone animal.
You will need to hold your rhinestone animal in place for a few minutes until the glue becomes more sticky. When you first place your rhinestones onto the glue its very slippery.
I recommend letting your glasses dry overnight, just to be safe. Also be very careful to not get any glue on the lenses of your glasses. If you do get any glue where you dont want it, I found I was able to clean it up with nail polish remover, but make sure you test it and proceed carefully. You dont want to take off more than you intend too.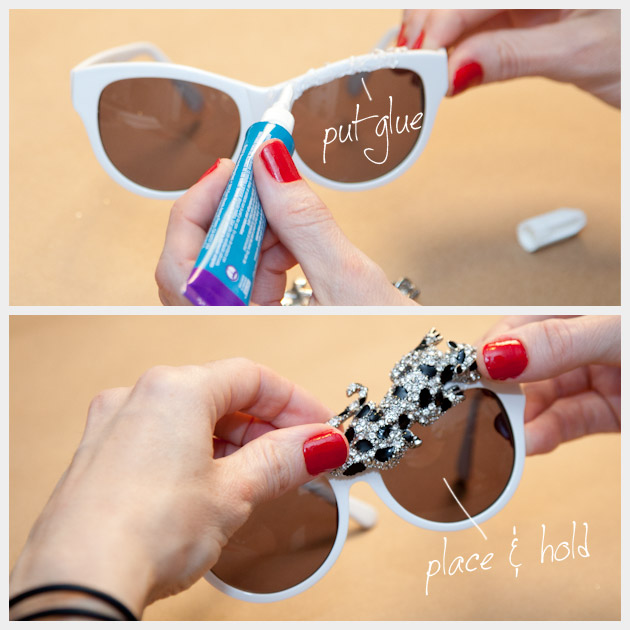
Rhinestone Cat Eye Sunglasses:
Step 1
The first thing youll want to do, is to take apart any jewelry you will be using. I pulled the rhinestones off of the hair pins and broke the links on the bracelet I used. Just make sure to do your best to clean up any rough edges left from braking them apart.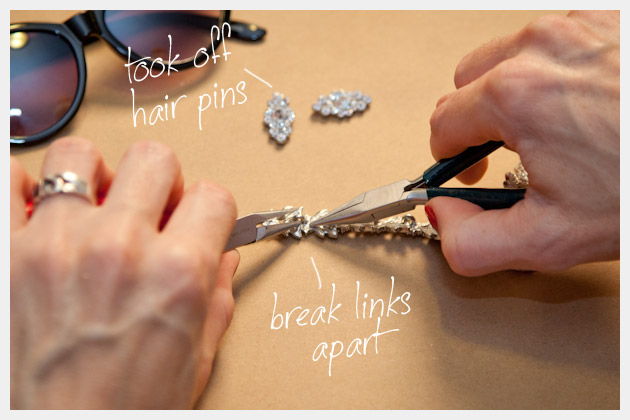
Step 2
Take your Aleenes jewelry and metal glue and place a small amount on the frame, where you will be placing the pieces of rhinestone. Then carefully place each piece one by one holding each one until the glue holds.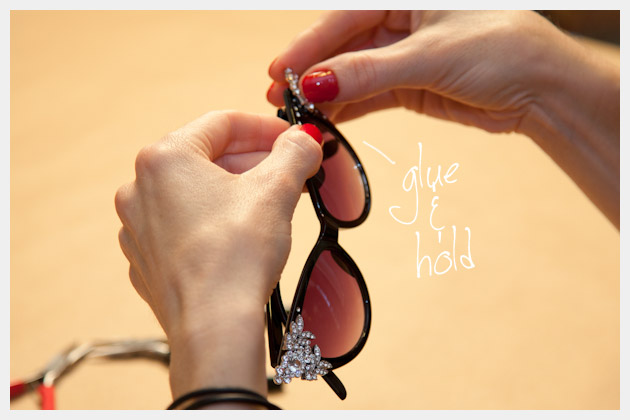
As I mentioned above for the Rhinestone Leopard Sunglasses; I recommend letting your glasses dry overnight, just to be safe, you dont want anything falling off while youre wearing them. Also be very careful to not get any glue on the lenses of your glasses. If you do get any glue where you dont want it, I found I was able to clean it up with nail polish remover, but make sure you test it and proceed carefully. You dont want to take off more than you intend too.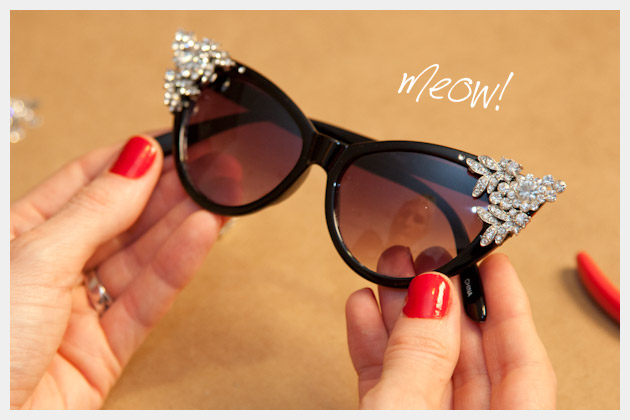
Sunglasses really are the perfect accessory; they protect your eyes from the harmful rays of the sun, they can protect the skin around your eyes from those nasty little wrinkles and theyre the perfect camouflage for when you didnt get enough sleep or just dont feel like putting on make up. Sunglasses can transform your whole look. These DIY Rhinestone Sunglasses are super simple to make and add some serious fun to your wardrobe. Ive always had a love for cat eye sunglasses and these two versions really take that look to the extreme.
So add some bling, change the silhouette and have some fun! Be sure to let me know how yours turn out.


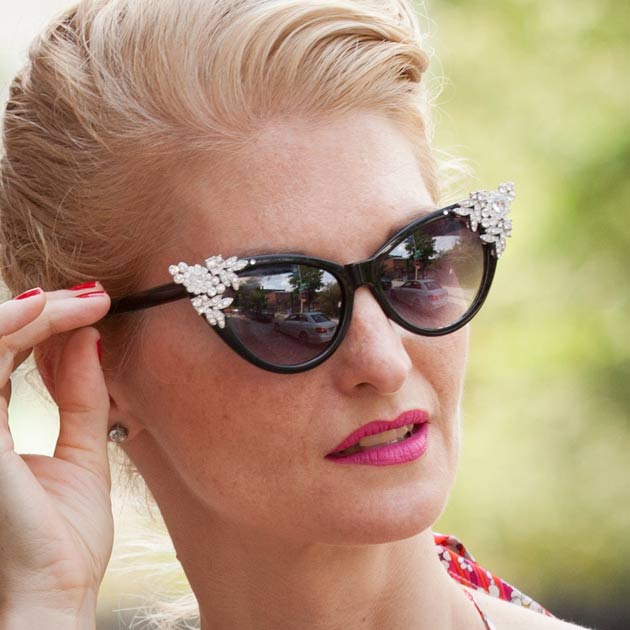
Love the black ones!
Kisses
Silvia
http://bornineightytwo.com
Thanks Silvia!
xoxo
Cathy
I adored the cat eye! It’s awesome
Hi Duygu,
Thank you!
xoxo
Cathy
awesome blog! not as cool as mine…. you tell me if mine is cool? simplybellasimplycute.wordpress.com
Thanks Bella!
I love your blog! Keep blogging and always push your creativity to keep your blog fresh and growing.
Your DIY’s are awesome!
xoxo
Cathy
Hi, Cathy,
Its awesome. All the glasses are looking stunning. I love them and will try one to make.
Thanks for sharing.
Hi Mary,
Thank you so much! Let me know how your glasses turn out!
xoxo
Cathy
can you please get on wordpress so I can LIKE LIKE LIKE LIKE!!! everything you post is so amazing!! your blog is so inspiring!!
Thank you so much!!!! I am on wordpress, what do you mean LIKE? I don’t want to miss anything. ;)
xoxo
Cathy
Hi! I have the same leopard necklace as yours! How did you make it stick to the sunglasses? They’re hollow at the back. Thanks! :) I love your DIY’s! I’m planning to do this one! Please reply! :D
Hi!
Thank you so much! For the leopard I used a lot of glue and I used the Aleene’s Jewelry & metal glue, you’ll need to hold it in place for awhile and make sure you let it dry overnight.
It attaches on the front of the glasses; the tail attaches on the bridge above the nose and the legs (on the right side of the cat) across the front of the glasses and then the top side (left) of the cat attaches on the top of the glasses. The glue covers a space about 2 inches from the bridge/middle of the glasses across the front of one side. I hope that makes sense.
Let me know if you have any other questions and let me know how they turn out. :)
xoxo
Cathy
Hi Cathy! I will! Can I ask where you got the sunglasses, too! :D Thanks! :D I’ll let you know if I’m successful. I hope I am! Hihi! :D
The white sunglasses are an old pair of Trina Turks that I’ve had for years. The black ones I bought at a souvenir shop in Coney Island. Recently I’ve seen some cute ones at Target, just make sure that the ones you use for the leopard are a little heavier, since the leopard is heavy. You don’t want them sliding down your face. ;)
Good luck! I know you will be successful! :)
xoxo
Cathy
I love the outfit.
the-renaissance-of-inner-fashion.blogspot.com
I love the black ones! You’ve got talent, girl!!!
I love this one so much i put it on my instagram page! Check it out @frhfashion :) great ideas love ur website