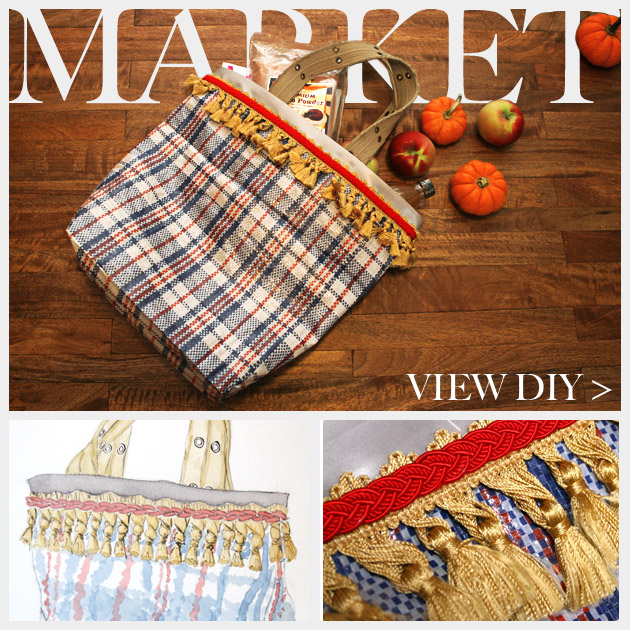
I love using reusable bags when I go shopping, but I dont want to carry the same old boring bags you see everywhere. Thats where this Market Bag DIY comes in.
This is a simple way to embellish a bag you may already have.
EMBELLISH YOUR BAG >
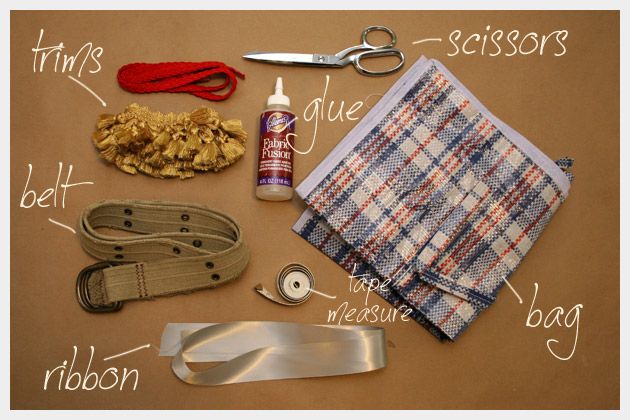
Supplies to make your Market Bag DIY:
- 1 Large plastic woven market/shopping bag
- 1 Utility belt (I got mine vintage)
- 1 Yard of tassel trim (I got mine at M & J trimming)
- 1 Yard of 1.5 inch satin ribbon (I got mine at M & J trimming)
- 1 Yard of braided trim (I got mine at M & J trimming)
- Aleenes Fabric Fusion (courtesy of I love to create)
- Glue I used Bond 527
- Sewing machine
- Tape measure
- Scissors
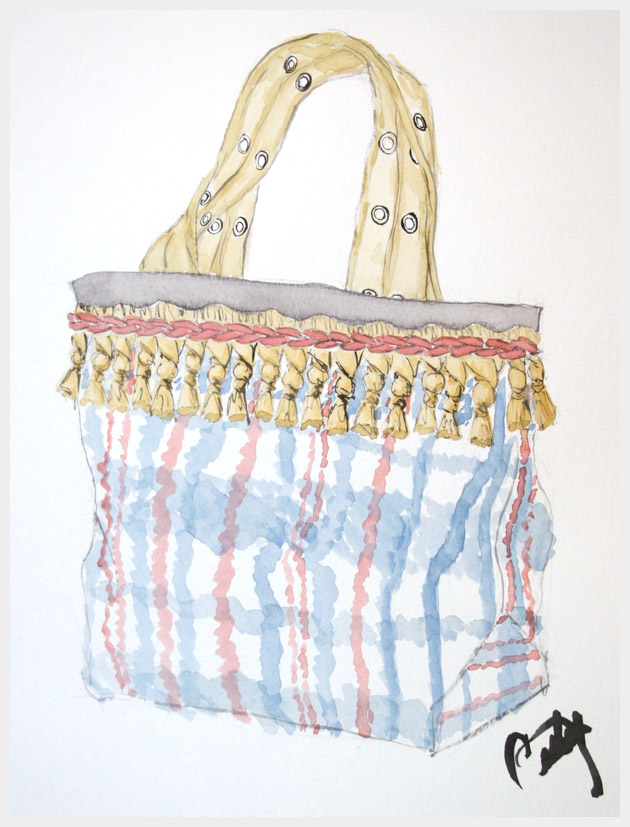
step 1
Take your market bag and first (if your bag has straps) cut them off.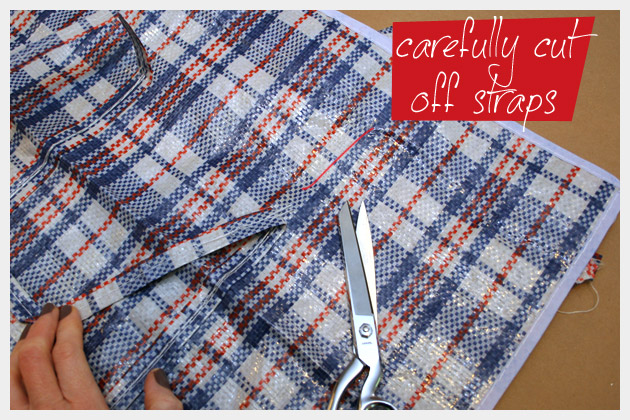
Then cut the sides off, but be sure to keep the front and back connected with the bottom.
step 2
Cut 2 slits on either side of the bottom, right on the fold. Make sure that your cuts are at least ½ inch longer than half the width of the bottom.
For example the bottom of my bag is 6 inches wide, so I cut 3.5 inch slits on either side of the bottom.
step 3
Turn your bag inside out and with your sewing machine sew your side seams together.
step 4
Turn your bag right side out, fold your top edge over and sew it.
I made my bag 14.5 inches high.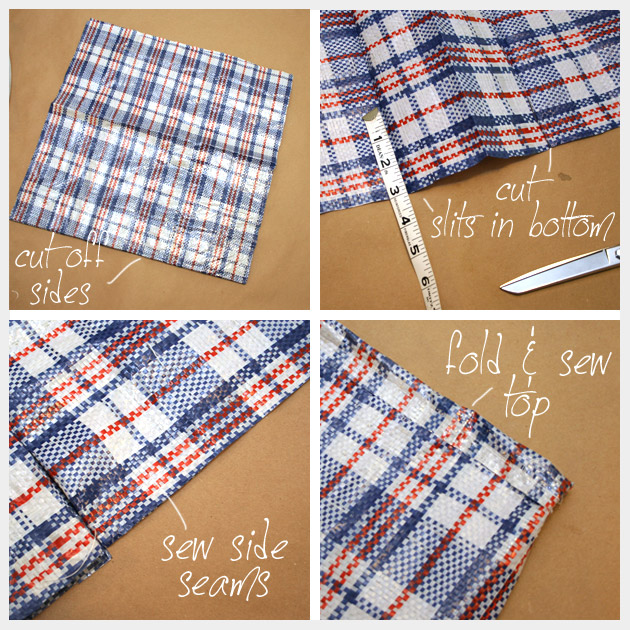
step 5
For the bottom flaps that are sticking out, fold each side into a point and using your sewing machine, stitch them down.
If you are more skilled than me, you can stitch them directly to the side of your bag with your sewing machine.
I couldnt scrunch my bag up enough to sew it, so I sewed it by hand.
I have to confess, I had a serious craft fail with this bag. I originally glued these flaps up and it seemed to hold. Then we went out to take the pictures and as I was walking I couldn’t figure out why my glasses kept falling…UGH! My flaps, flapped open! CRAFT FAIL!! LOL!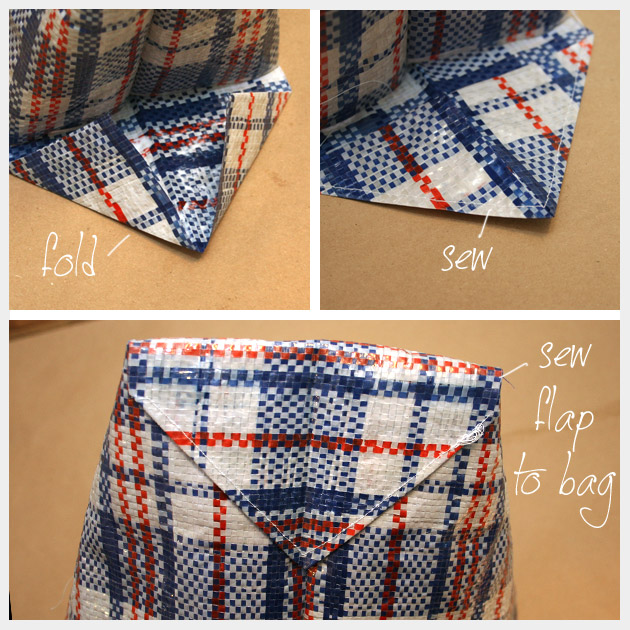
step 6
Take your belt and cut it in half, make sure to remove any buckles too.
Sew the ends of your belt to the top of your bag.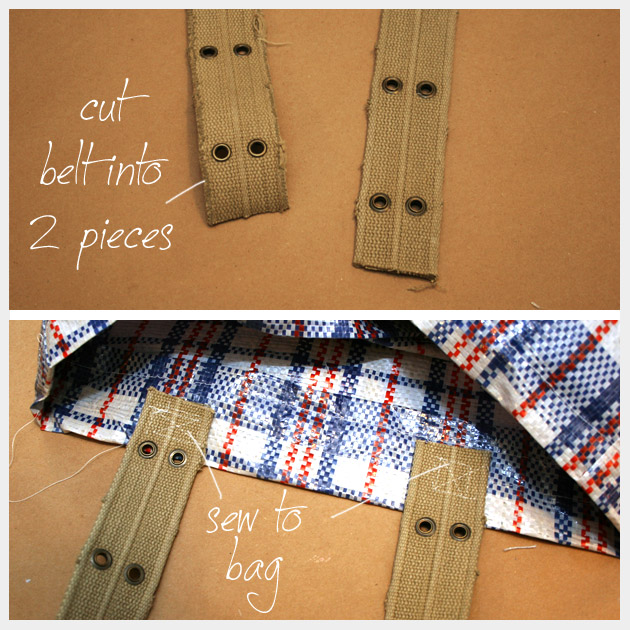
step 7
Take your wide satin ribbon and glue it all the way around the top of your bag.
Then glue your fringe just overlapping the bottom of your satin ribbon.
Take your third trim and place it where it looks best, somewhere in the middle.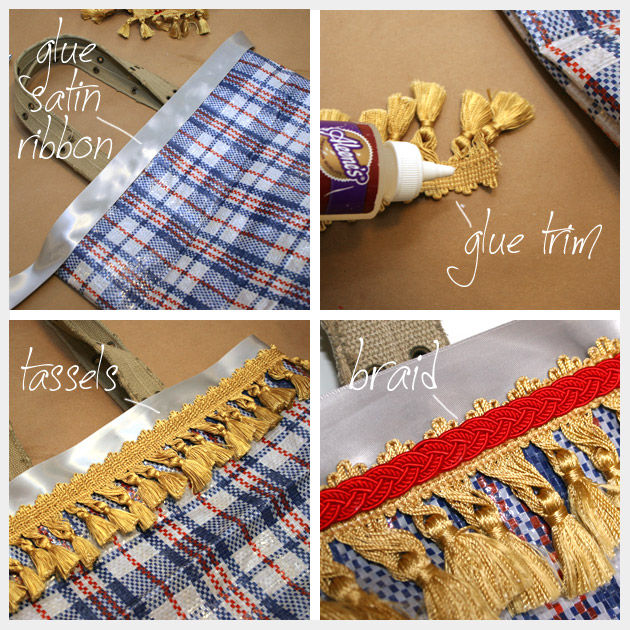
I love the mix of colors, stripes and plaid in this fun market bag DIY. You can also line this bag as well if you want to use it as an everyday tote bag. You can get really colorful and creative with your trims and use any sort of tassels or pom poms across the top of your bag.

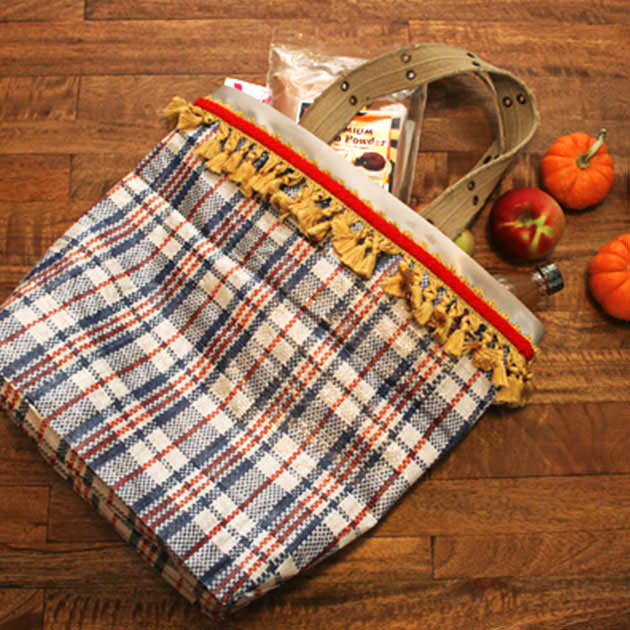
Such a cute update to a plain grocery tote! I love the trims and LOVE the belt handles!
xx
Lia
Smart n Snazzy
Thanks Lia!
xoxo
Cathy
very creative!
I linked to your tutorial on my blog – thanks for sharing!
doro K.
Hi Doro K.
Thank you so much!
xoxo
Cathy