
With a big t-shirt, some pretty embellishments and a bit of sewing you can turn a boring t-shirt into an amazing DIY Studded T-Shirt, inspired by Botega Veneta.

CUT IT UP >
I was inspired to make this DIY Studded T-shirt after I saw this add for Botega Veneta. I think it’s just stunning and I knew it was way out of my price range, but with this DIY you can make a similar version for about $20!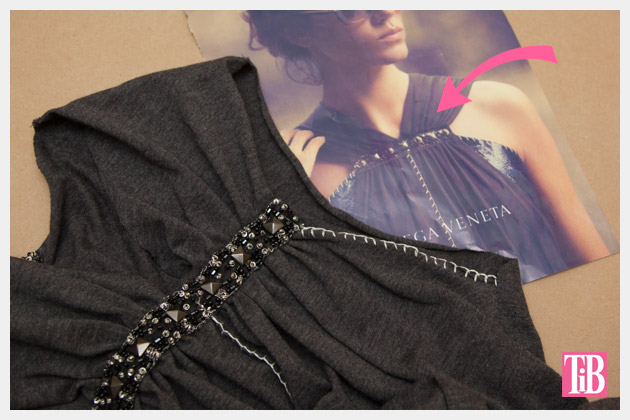
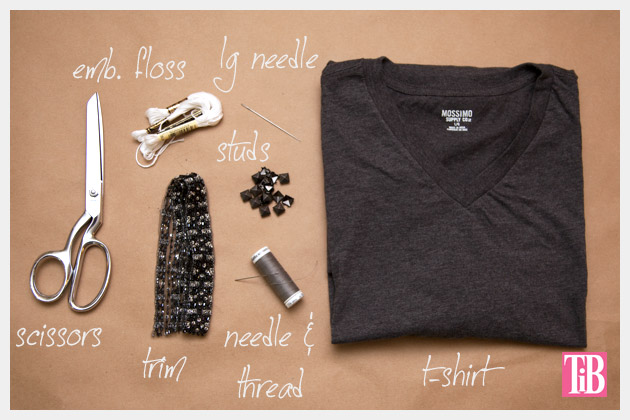
TOOLS & MATERIALS:
- Large V-neck t-shirt (I bought a men’s t-shirt at Target)
- Trim (I bought mine at M & J Trimming)
- Studs (I bought mine at M & J Trimming)
- Embroidery floss
- Large sharp needle
- Needle and sewing thread
- Scissors
- Pins
- Sewing machine
- Pliers
step 1
Lay your t-shirt out and cut off the sleeves and the neck band.
I used a large mens t-shirt for this project. I recommend a t-shirt that is a few sizes larger than you would normally wear, that way you will have lots of fabric to make your gathers and for your t-shirt to drape a bit.
TIP: I recommend you try your t-shirt on frequently while you are making this top to make sure everything is where it should be.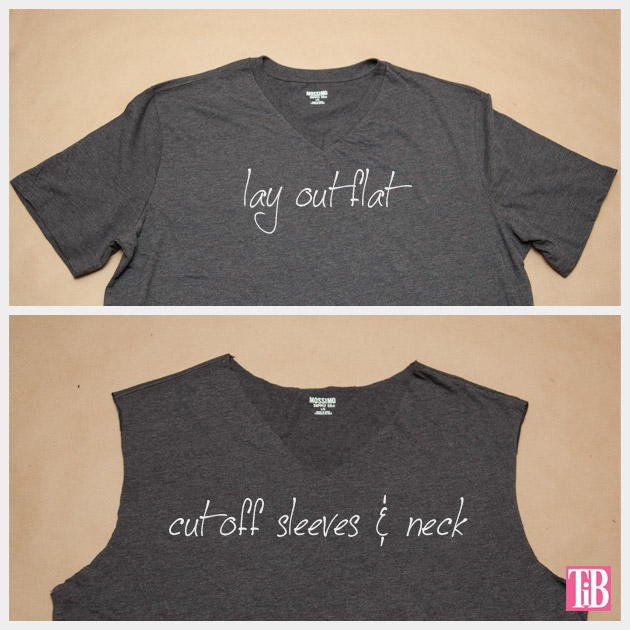
step 2
Fold your t-shirt in half the long way making a fold down the center front.
Cut the front of your t-shirt open from the bottom of the V-neck to the bottom hem.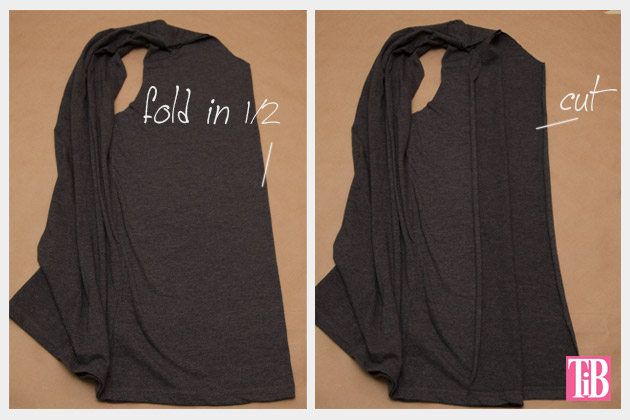
step 3
Pin your two sides together down the center front where you cut.
Using your embroidery floss and your large needle, sew your seam by using a large blanket stitch.
Sew this seam all the way down to the bottom hem.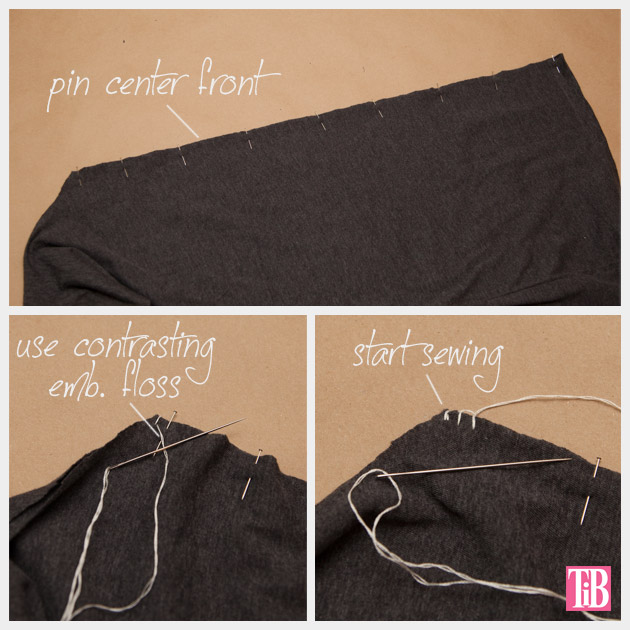
step 4
Using your needle and sewing thread, sew gathers across the front of your t-shirt, right under the bottom of your V-neck.
Try your t-shirt on to make sure you’ve gathered it enough. I made my gathers about five and a half inches across.
When you are happy with the width of your gathers secure your thread at the end and sew back through another time across your gathers and secure your thread.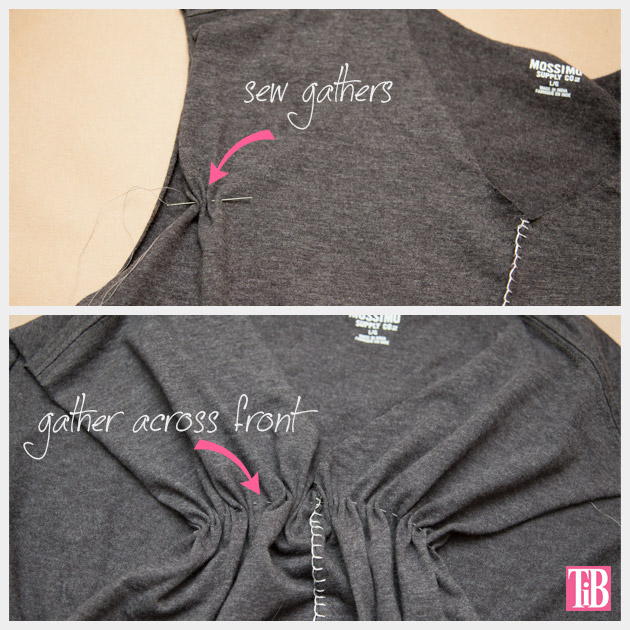
step 5
Measure your trim and leave at least one inch extra on either side to fold over.
Layout your studs and decide where you will place them.
Push your studs through your trim and fold the prongs over to hold them in place.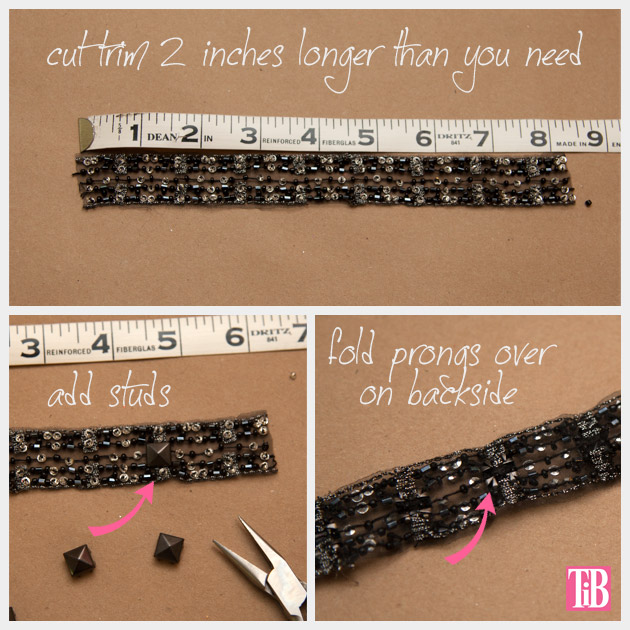
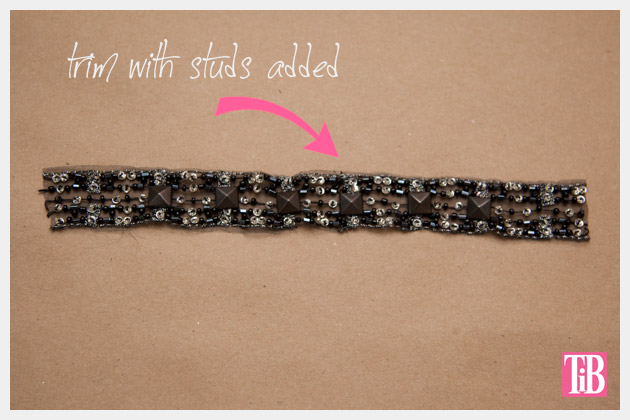
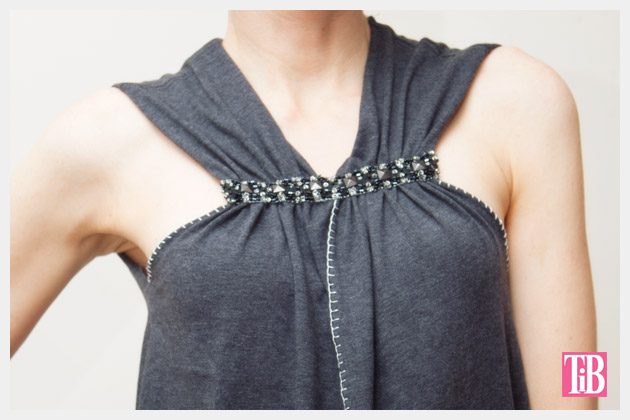
step 6
When your trim has all the studs attached, pin it to the front of your t-shirt on top of your gathers. Wrapping the ends of your trim around to the backside to hide.
Using your needle and sewing thread sew your studded trim to your t-shirt.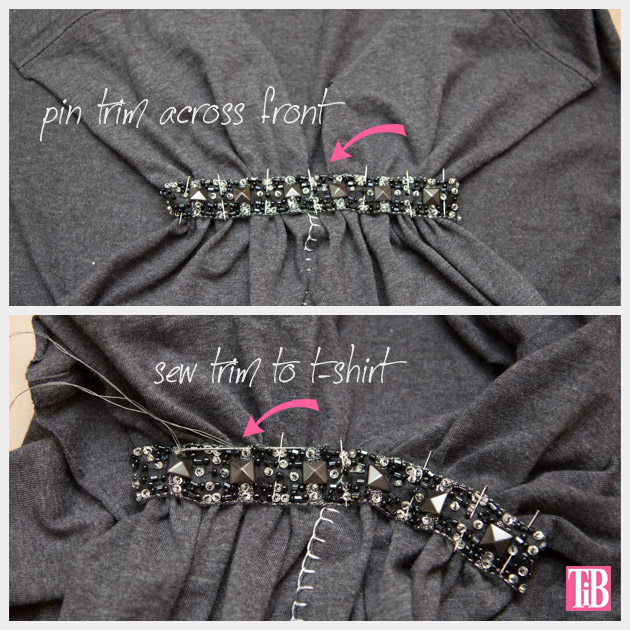
step 7
Try your t-shirt on. If your t-shirt is hanging a bit on the sides, turn it inside out, put it on and pin it starting at the armhole to bring it in tight.
Continue pinning down the side of your t-shirt gradually angling out towards the seam.
Sew this seam with your sewing machine.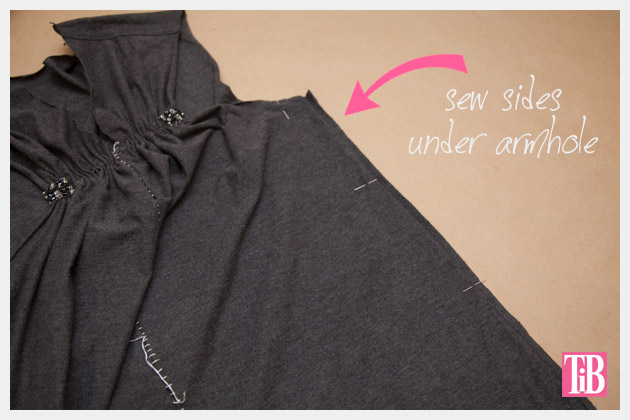
step 8
Turn your t-shirt right side out and try it on.
Fold and pin a small tuck in the back right at the center of the neckline.
You can also fold the top edge over too to make it look smoother.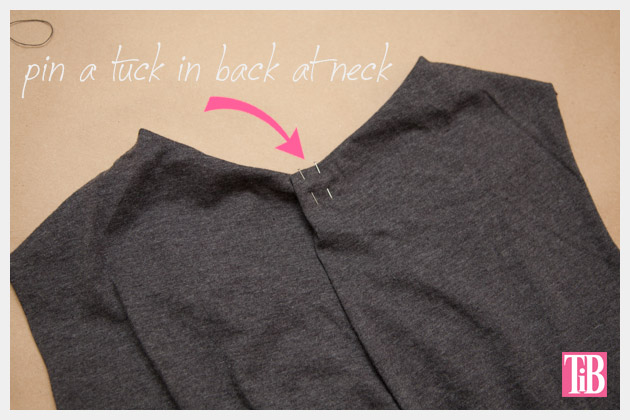
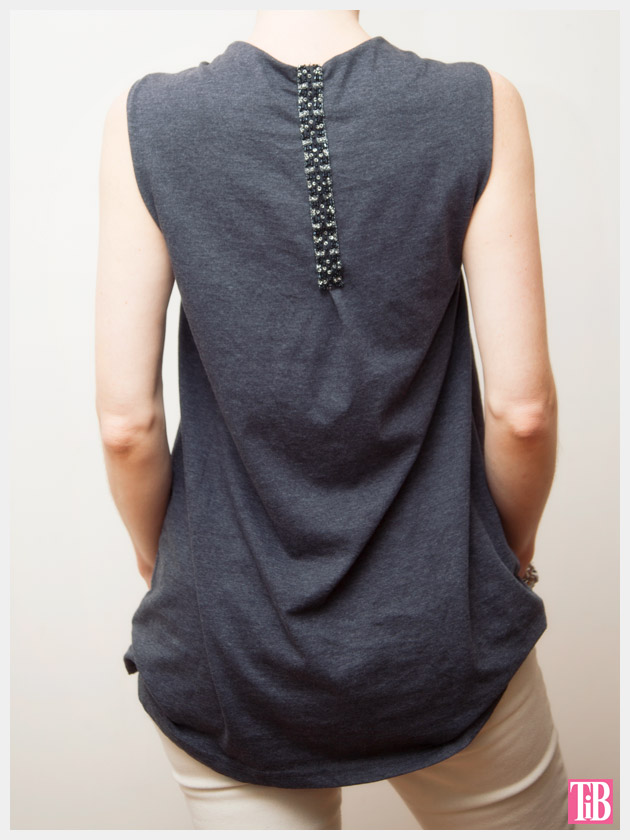
step 9
Cut another piece of your trim to attach to the center back of your t-shirt.
I cut mine about 10 inches, this left me enough space to fold it over at the top and bottom to make it look clean.
Pin your trim to your center back starting at the top and using your needle and thread sew it to your t-shirt.
step 10
Using your embroidery floss and your large needle, sew a decorative blanket stitch along the front armholes of your t-shirt.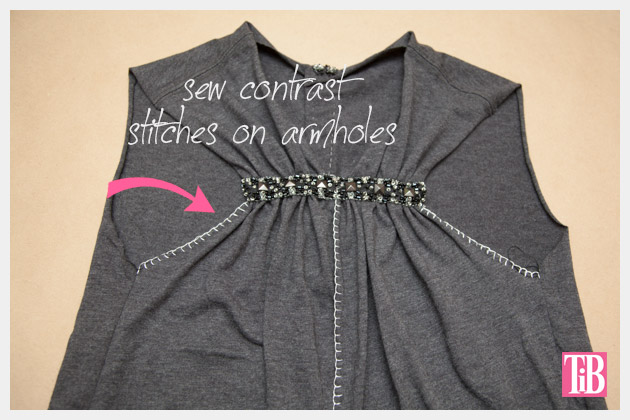

This was a really fun DIY to make, I love turning something plain and utilitarian into something spectacular. You know there’s some kind of potential in there, it just needs to be brought out.
Cathy this is incredible! What a fabulous job, it’s hard to believe it was a men’s t-shirt :)
xo
Lia
Smart n Snazzy
Thank you so much Lia!
xoxo
Cathy
Love this!!
Thanks Anne!
xoxo
Cathy
When my brother complains (again) about how my oh-so-kind offers to do his laundry seem to result in a new top (or five…) for me – I am going to blame it all on you!
That is such a great t-shirt makeover!
Hey there, Cathy!
I love this DIY and I love how it turned out. But may I suggest using black thread rather than white? I just think it would blend in more and make the stitching and sewing less obvious.
Lots of love, Layna.