
Today I’m sharing my progress on my DIY Miu Miu Crochet Top. If you follow me on Instagram you’ve seen a few sneak peaks, but here’s full story (in progress).
 The above image is Jane from Sea of Shoes rockin this look.
In case you missed it, last week I shared this post where I talked about this top from Miu Miu and how I wanted to make one.
So the awesome people at Lion Brand Yarn were nice enough to send me the yarn. I’m using their Kitchen Cotton, which is a really nice 100% cotton yarn, it’s very easy to work with. I’m using black, red and white to look like the featured top. But as you can see it looks great in lot’s of color combinations. I just knew that I would wear something with black in it the most. 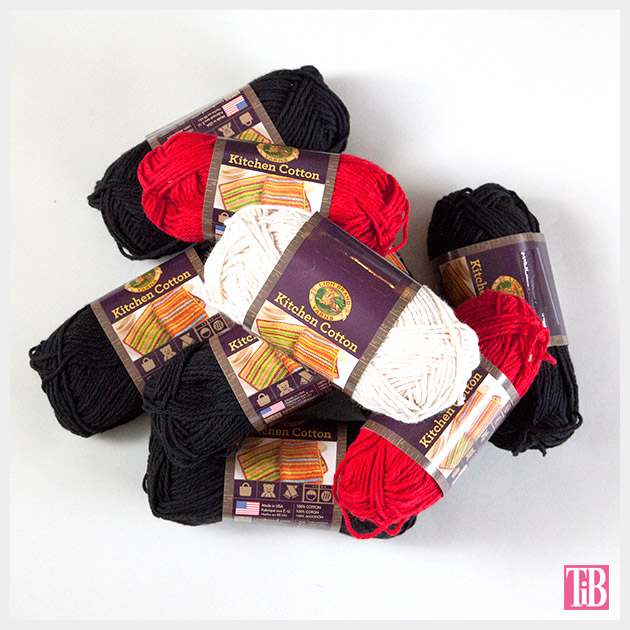
And so I got started!
I’ve started with the front and one large granny square. I’m following this pattern for the large granny square for the front.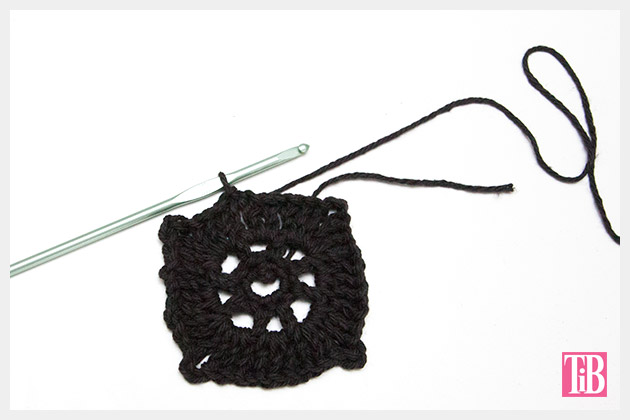
If you’ve made granny squares before you already know this, so just make one big square.
You can stripe your colors any way you want, I’m following the Miu Miu design.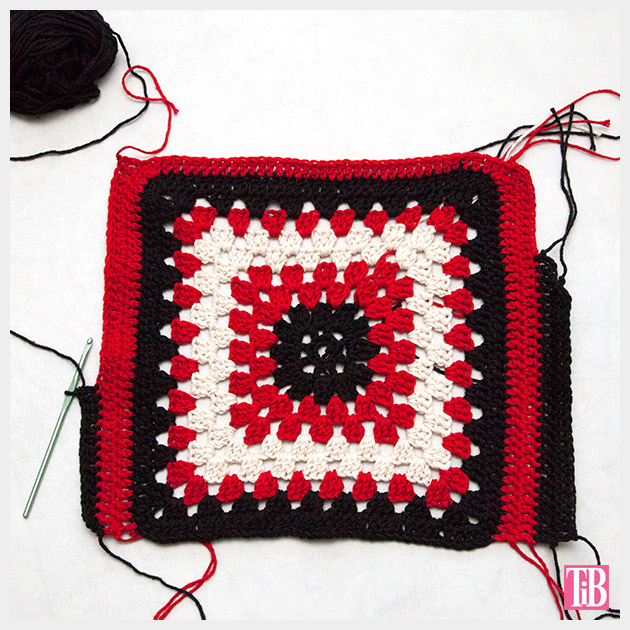
As you work on this make sure you are always working on the right side, don’t switch sides. I am also left handed, if at any time mine looks backward to you that’s why.
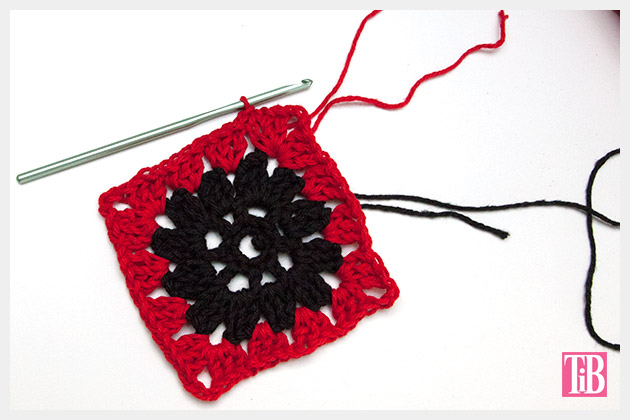
After I finished my granny square I did one row of double crochet all the way around (in the black). That’s 1 double crochet in each stitch.
For the next row I changed color (to the red) and did a row of double crochet around 3 sides only. That’s 1 double crochet in each stitch with 3 double crochets in the center stitch on the corners.
When you are finished with this row, fasten off your yarn. You will begin again on the next row. I’m doing it this way to keep my stitches looking uniform.
Starting on the side that will be on the left side of your body, slip stitch into the top corner and chain 3. Double crochet in each stitch down the entire side. Fasten off your yarn.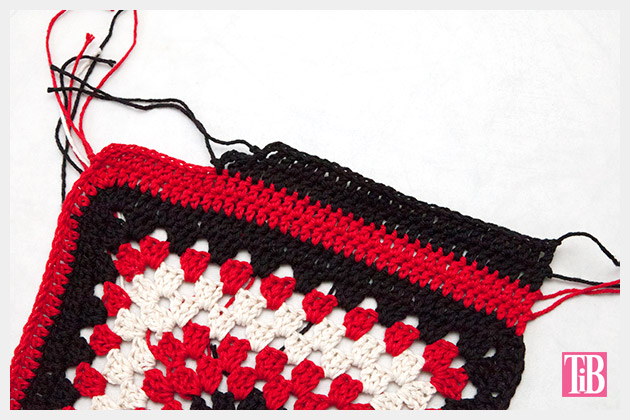
Working on the same side, I started with another color (I used black) countdown 11 stitches, slip stitch into the 12th stitch and chain 3, double crochet in each stitch all the way down the side. Fasten off your yarn.
Starting on the same side countdown 3 stitches from where you started the last row, slip stitch in the 4th stitch, chain 3 and double crochet in each stitch all the way down the side. Fasten off your yarn.
You’ll do the same thing on the other side, but you will start at the bottom.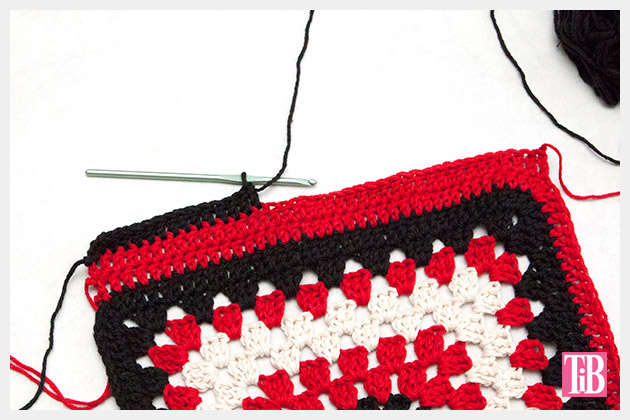
The first row (red) will go all the way up the side.
The next row will stop 11 stitches from the top.
The next row will stop 3 stitches from the end of the previous row.
Ok, so that’s where I am right now. If this is crazy or confusing (I hope not) You can either follow the above link for that pattern or this link to Lion Brand’s pattern, which is very similar to the Miu Miu top.
Since posting this I have finished the top, click here to see the finished sweater.
Will you be making this DIY Miu Miu Crochet Top? Leave me a comment and let me know.
If you are making this top along with me, please let me know I’d love to see pics of your top!
Hello,
Yes I am certainly will be making this top. Please keep us posted on your progress and post photos. Would love to see the final results.
Thanks Lina!
I have finished it, here’s the link to the post with the final pics. http://www.trinketsinbloom.com/miu-miu-diy/ I’d love to see pics of yours when it’s finished!
xoxo
Cathy
this model of pattern is magnific!!!!!