One of the big trends for fall shoes, is the puritan style (in all heel heights); Chanel, Marc Jacobs and Miu Miu all have them (enough said). Now you can be on trend and comfortable with this Puritan Ballerina Flats DIY project.
No matter how much you love heels, everyone needs a great pair of flats now and then.
VIEW DETAILED INSTRUCTIONS >
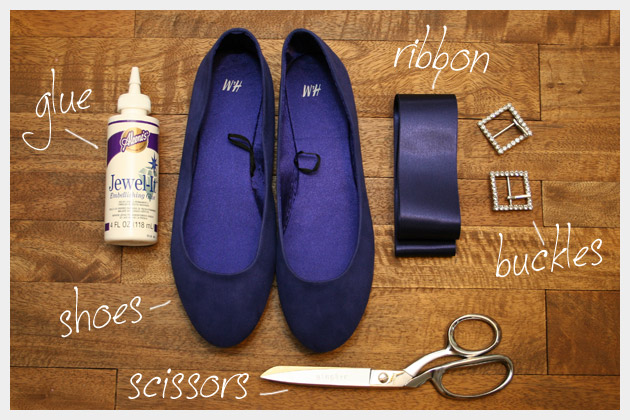
Supplies to make your Puritan Ballerina Flats DIY:
- 1 Pair ballerina flat shoes (mine are from H & M)
- 1 Yard of 2†satin ribbon (always get a couple inches extra)
- 2 Rhinestone buckles (mine are from M & J)
- Glue – Aleenes Jewel it to glue the buckles to the shoes
- Hot glue (I ended up using hot glue for everything, I was too excited I couldnt wait for the glue to dry.)
- Needle & thread
- Scissors
Step 1
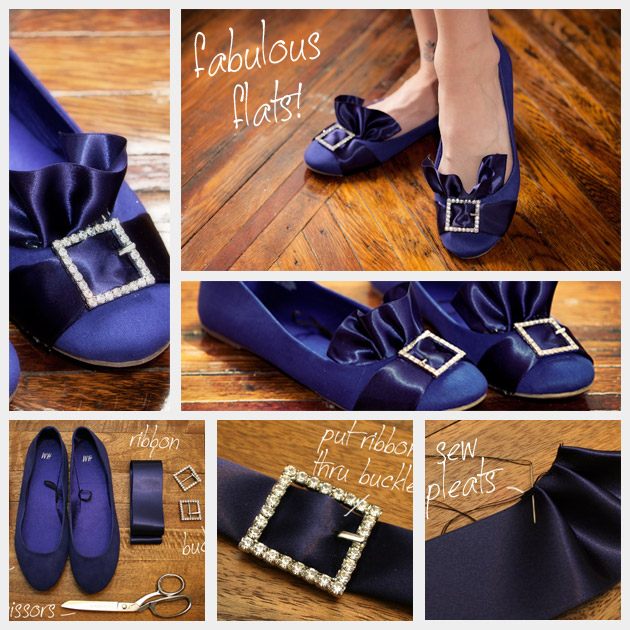
Measure across the toe box on your shoes, exactly where you will want your ribbon to go. Then cut 2 pieces of your ribbon to that length, with a little extra (just in case).
Step 2
Lay your cut pieces of ribbon out flat and set your buckle on top, measure where you will make your hole, “to buckle your shoesâ€. Once youve measured, pierce a hole in your ribbon with your scissors.
Step 3
“Buckle your shoes†by feeding your ribbon through your buckle.
Step 4
Glue your buckles to your shoes. If youre using the Aleenes Jewel-it, youll want to place the jewel-it on to your shoe and let it sit for at least 10 minutes before pressing your buckle into the jewel-it. Then youll need to let it dry for a few hours before continuing.
If youre using hot glue, apply your hot glue directly to the top of your shoe where you will be placing your buckle and press your buckle into it. Hold it until it dries/cools.
Step 5
Once your glue is dry and your buckle is secure, pull your ribbon gently but firmly toward the sole of your shoe. Mark a line, on your ribbon, along the edge where the upper part of the shoe meets the sole. Cut your ribbon along the line where you marked it.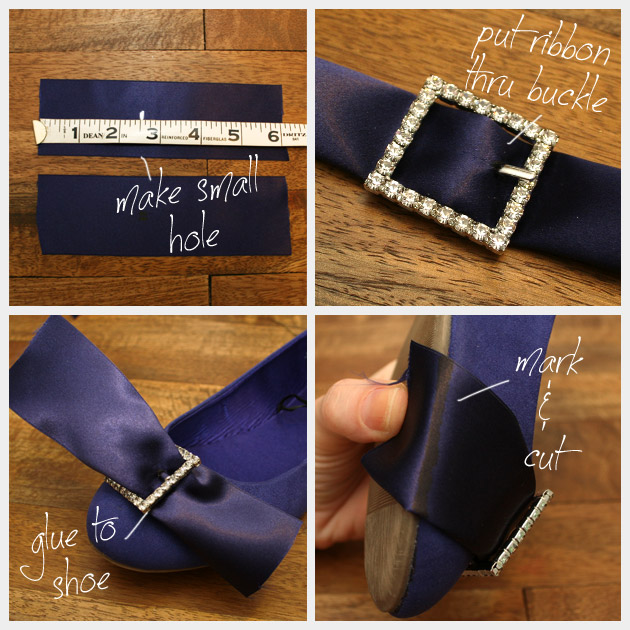
Step 6
Using your hot glue, place a line of glue on your shoe along the edge where you want to glue your ribbon to your shoe. 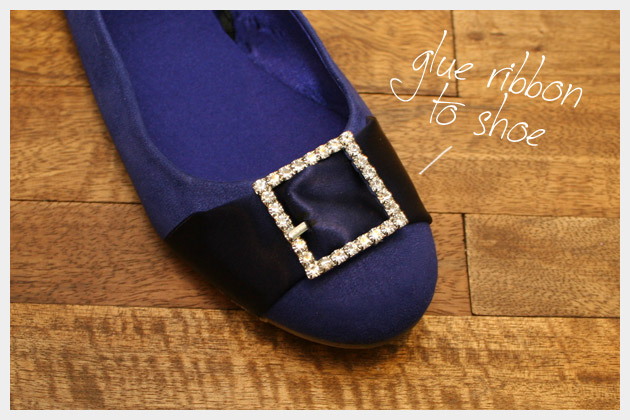
Step 7
Take your remaining ribbon and cut it in half. Take one piece of your ribbon and your needle and thread, fold your edge over about a ¼ inch and stitch it down right along the edge. Then continue making small pleats until you feel your ruffle is wide enough for your shoe. When you get to the end trim your ribbon and fold it over the same as you did at the beginning about a ¼ inch and stitch it down.
Make 2.
Step 8
Attach your ruffles just inside your shoes with your hot glue, be careful not to put too much hot glue or it will squish out and add extra bulk you dont want.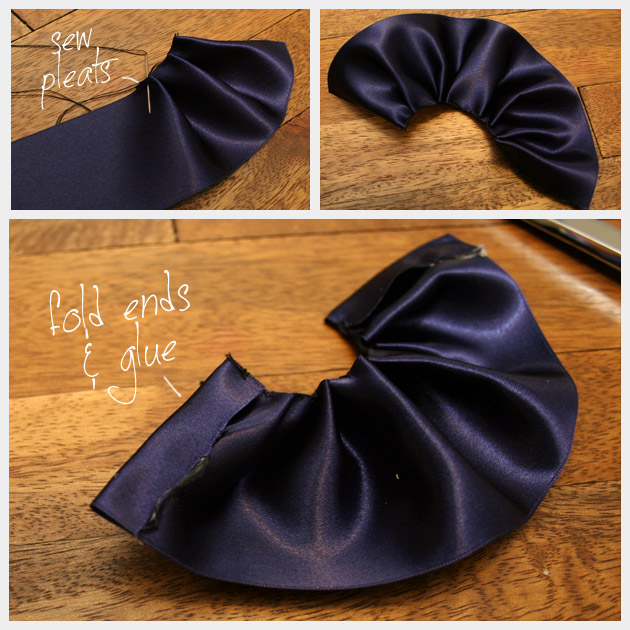
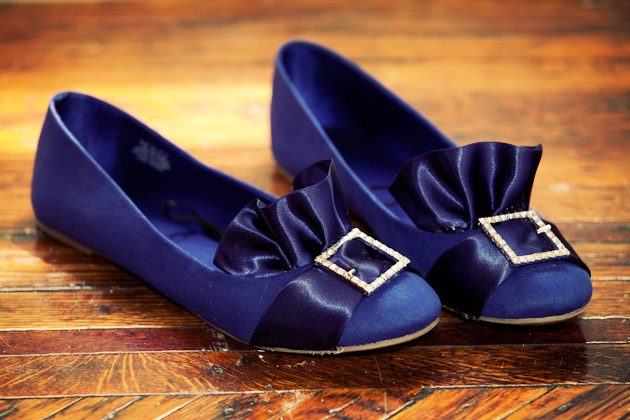
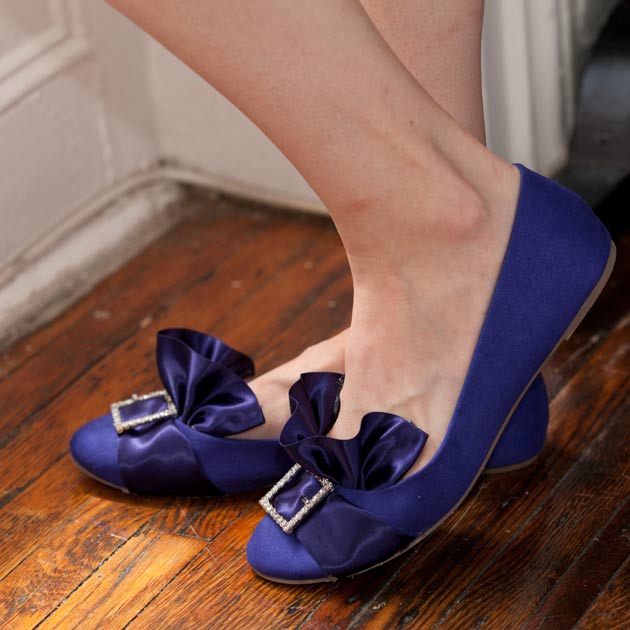
Im so excited about how these Puritan Ballerina Flats turned out. This was one of those DIYs that just came together, as I was making them. The rich deep blue is just dreamy! I love the sparkle of the rhinestone buckles, and the extra ruffle at the top, these make my feet happy!
I know the original Puritan style was far from embellished or sparkly (in fact Puritans were pretty anti sparkle), but thats the beauty of reinventing a trend. That said, the Puritan style definitely adds a great silhouette to embellish.

Hi to all, I love this project but does anybody out there know how to make these flats
By hand,instead of buying a plain pair,is it possible to make your own,by hand?
Please,if some one knows,kindly share. Thanks in advance.
This is totally amazing!!! I aspire to do this, myself – thank you for sharing your talent :)
Thanks Jessica,
xoxo
Cathy