
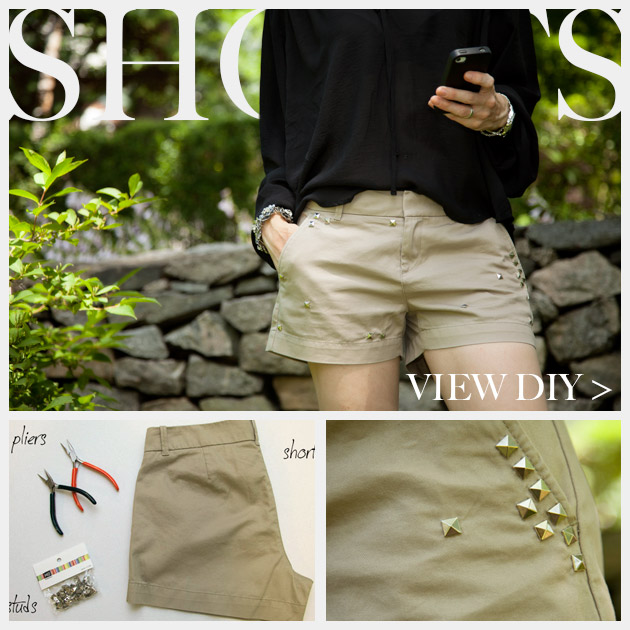
A cute pair of chino shorts mixed with silver studs makes these DIY Studded Shorts super chic and right on trend for summer.
GET READY TO STUD >
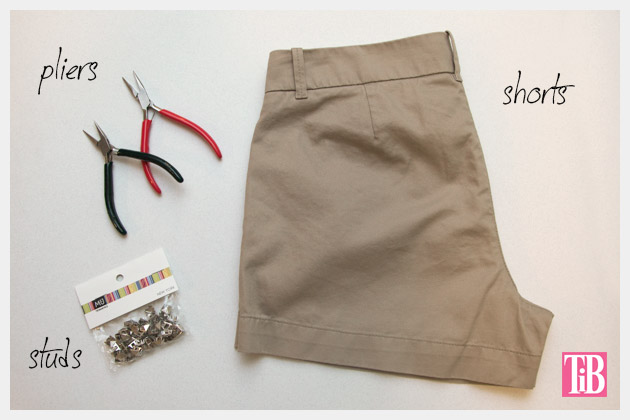
TOOLS & MATERIALS:
- 1 Pair of shorts (I got mine at Uniqlo)
- Silver pyramid studs (I got mine at M & J Trimming)
- Pliers
- Pencil
step 1
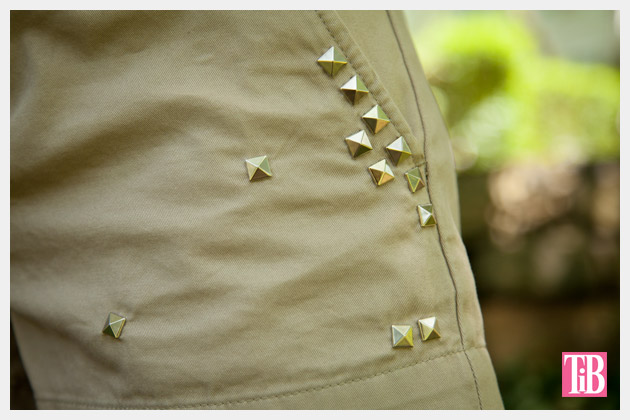
Layout your shorts on a flat surface and decide where you want to place your studs.
I placed mine very random and spaced apart to look as if some were missing. I didnt want them to look too perfect.
Once you have your studs placed where you want them, I recommend using your phone to take a quick picture just in case you forget your placement.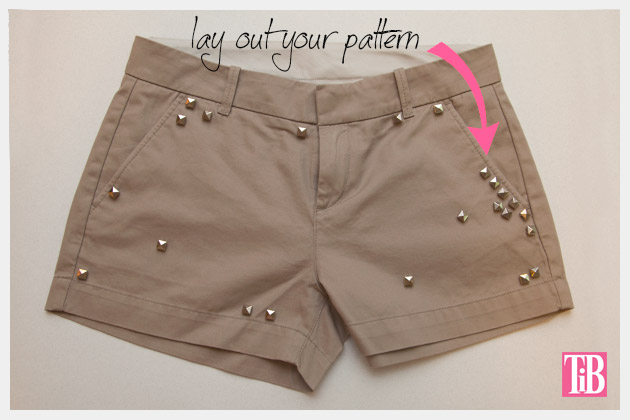
Using a pencil put a small dot on your shorts right where you want your stud to be.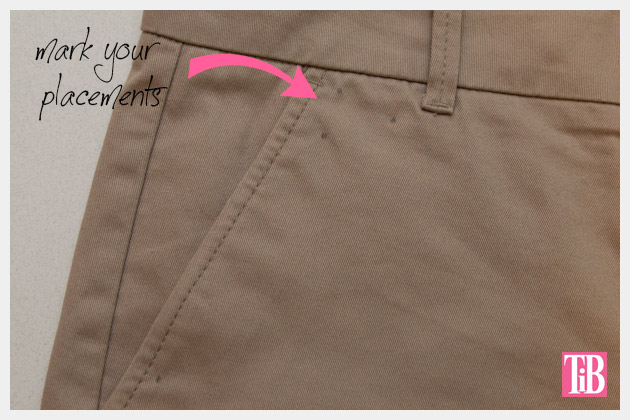
step 2
Take your stud and place it on top of the dot you made and push the prongs through the fabric.
Make sure you push them all the way through.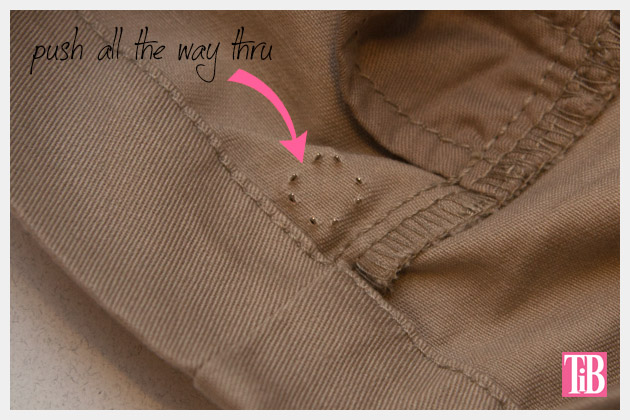
Using your pliers bend all the prongs over and crimp them down to make a flat surface on the backside of your studs. You dont want to have any prongs sticking out to poke you or catch on anything.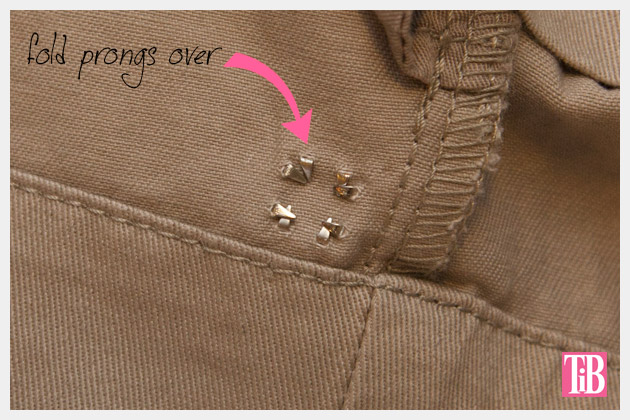
step 3
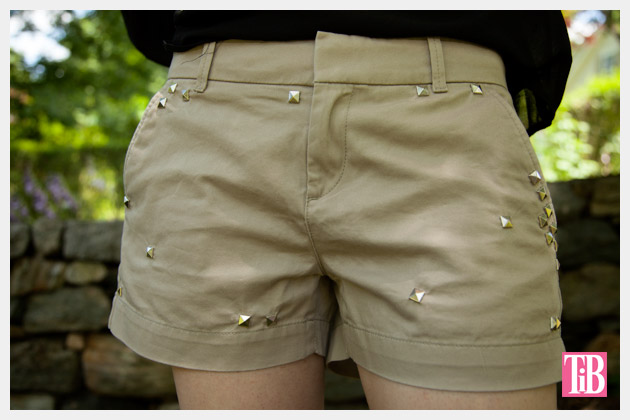
Continue placing all your studs on the front and back of your shorts, until youve placed them all where you want them.
I placed just a few on the back around the pocket, for a subtle detail.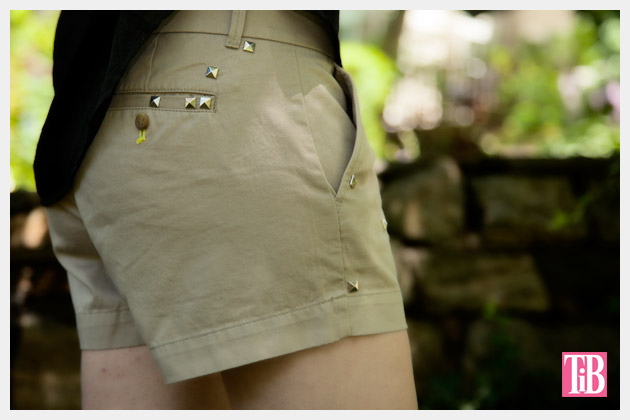
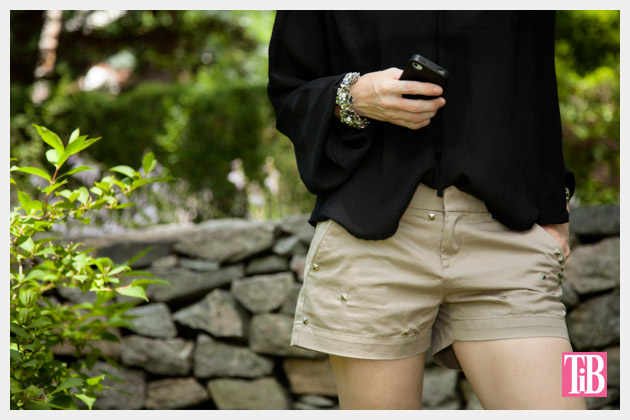
I think these shorts are going to be my new go to pair for the rest of the summer. Adding just a few studs is such a simple solution and a great way to add a subtle embellishment to a basic pair of chino shorts. You can easily dress them up or down depending on your mood.
If you want a more relaxed casual look you could even distress them or fray the edges. Its really up to you.
You are very talented person, great post dear! xoxo
Thank you so much Joice!
xoxo
Cathy