
Don’t sacrifice form for function as the weather gets chilly, stay warm and chic with this no sew DIY Shearling Vest.
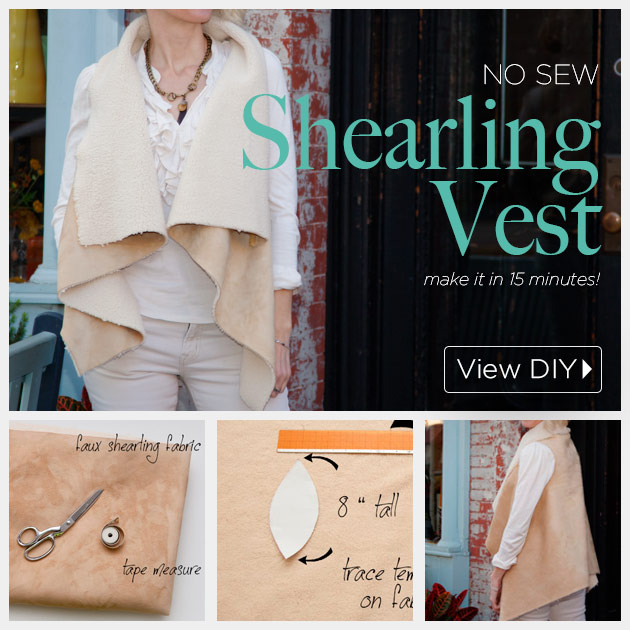
Keep the chill out by making this no sew DIY Shearling Vest and be out the door in about 15 minutes!

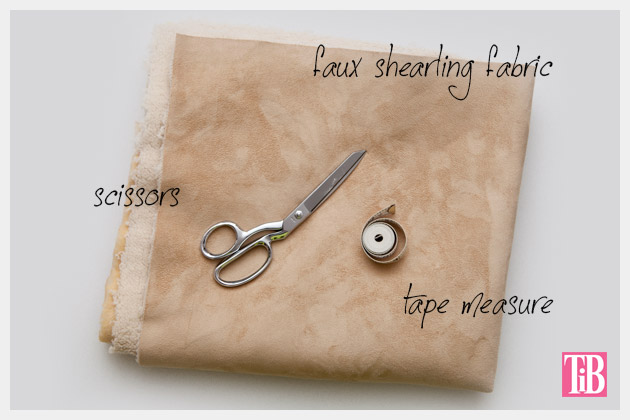
- 1 Yard Faux Shearling Fabric
- Scissors
- Tape measure
- Pins
- Paper & Pencil
TOOLS & MATERIALS:
step 1
Lay your faux shearling fabric out flat.
Most faux furs are about 60 inches wide, so I recommend starting with that width, you can always trim it later.
Measure from the back of your neck to where you want the bottom of your vest to be, be sure to add 3 or 4 inches to fold over at the neck.
I made mine 30 inches tall.
step 2
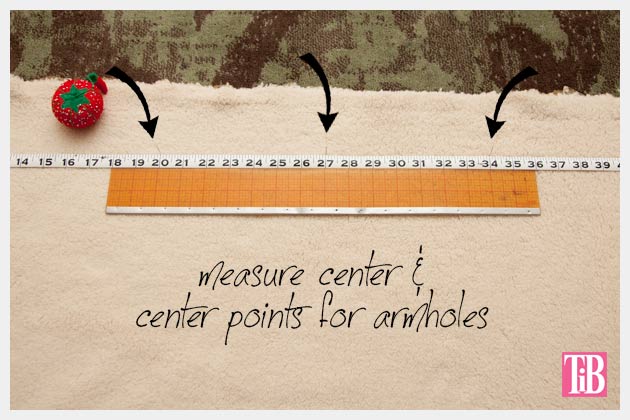
Measure the distance between your shoulders and then add an inch or two, this will give you the measurement for the center points of your arm holes.
Find and mark the center of your fabric with a pin.
From this center point measure out to the center of your armholes and mark with a pin.
Be sure to give yourself about 7 or 8 inches of space down from the top edge of your fabric. This will give you enough space to fold over your collar.
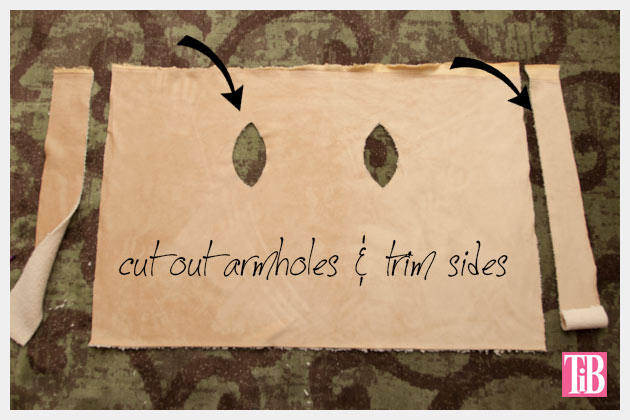
step 3
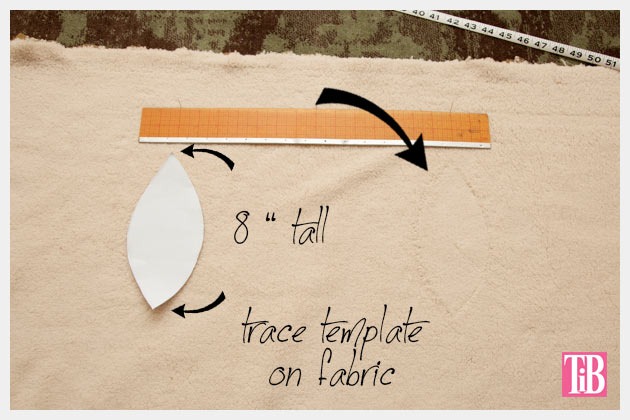
On a piece of paper, draw an almond shaped pattern for your armholes.
I made mine 8 inches tall by about 4 inches at the widest part.
This is a good place to start, you can always trim your fabric to make your armholes larger if you need to.
Trace around your armhole pattern onto the inside of your fabric and cut out.
step 4
Try your vest on.
If you need to trim some from the front sides you can do that too.
TIP: After you’re finished cutting take a lint roller (or tape) and pick up all the loose fuzzies and hairs from your faux fur.
This Shearling Swing Vest from Anthropologie inspired me to make this DIY. It’s so cute and simple to make and sure to save you some cash, especially if you check out the sales at Joann’s or take your coupon (they seem to always have one or the other).
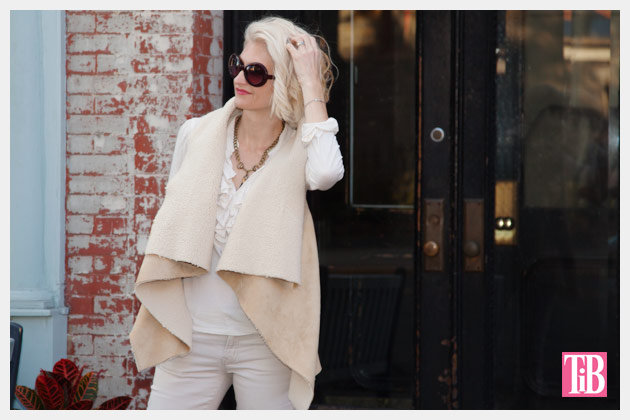
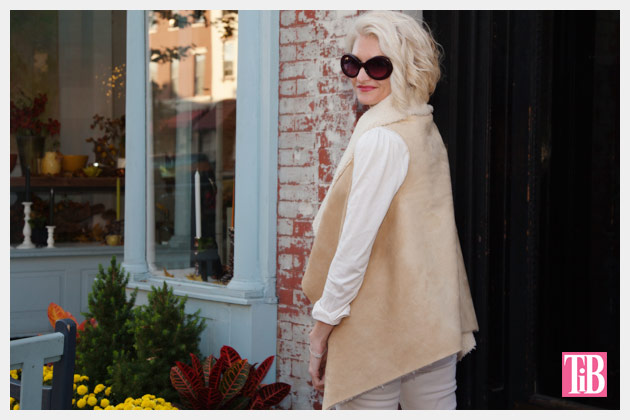
I love how snuggly this vest is, you can totally layer it for fall without feeling too bulky. And seriously who doesn’t love a great project that looks fabulous and doesn’t require sewing?
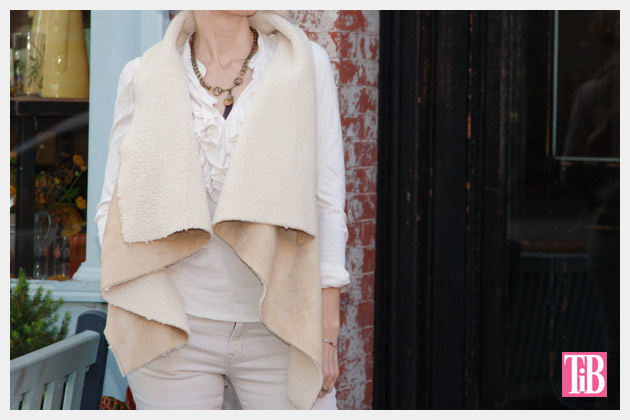
Stay warm! xoxo
Leave me a comment and let me know how your vest turns out!
So easy, Cathy! I love how you’re rockin’ it too :)
xo ~ Lia | Smart n Snazzy
Thanks Lia! :)
xoxo
Cathy
I decided to make this last night and it was a fun project, but mine doesn’t drape as nicely as yours-even after I rounded out the bottom and trimmed it some more. Also, there are white fuzzies all over my shirt now. Do you have any suggestions for me? It was my first DIY clothing project, so I loved that it was no sew and so straight forward :)
Hi Jordyn,
I’m so glad you made this. The drape of the fabric really depends on the type of fabric you use. A thinner softer fabric will drape better than one that’s thicker. As for the fuzzies, I got them too with mine. A good lint roller will help LOL. Most of the fuzzies are probably coming from the edges, you could try a fabric glue (but not too much, so it won’t be stiff). Also after you’ve worn it awhile you wont get so many as the edges will stop fraying. I hope this helps! :)
Thanks!
xoxo
Cathy
I was just looking for one to buy and saw this, I think I’m going to try making it tomorrow. My only question, any idea how y could add pockets? I know that will make it a sew vs. no sew but I’m just wondering, thanks!