
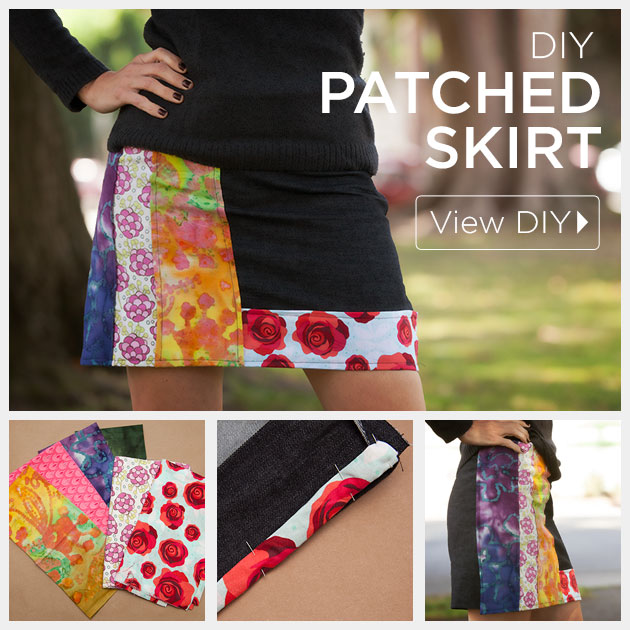
Patch it up! As part of the Jo-Ann Sew Your Style Contest sponsored by Pellon, I made a super cute DIY Patched Skirt without a pattern. See how you can make your own!
It’s National Sewing Month! To celebrate this, JoAnn Store’s have chosen 30 bloggers to create a project using quilting fabric without making an actual quilt. You can get in on this too when you submit your project for a chance to win $1000 and/or a prize pack from Pellon and/or a Singer sewing machine! Click through to enter the Jo-Ann Sew Your Style Contest sponsored by Pellon between September 1 – 30th.
TOOLS & MATERIALS:
- 1-2 yards of heavy fabric
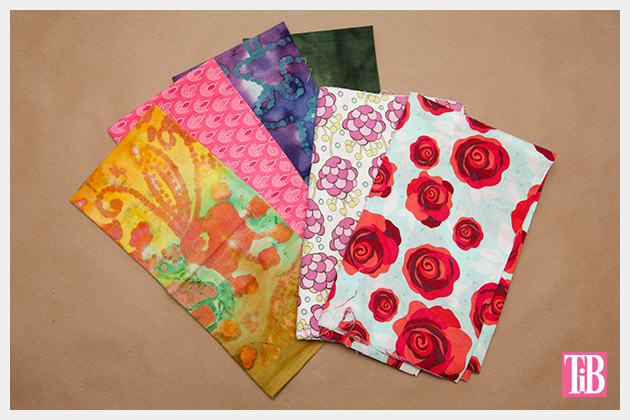
- 3-5 ¼ yards of different printed fabrics
- Zipper
- Sewing machine
- Pins
- Thread
- Seam ripper
step 1
Measure around the widest part of your hips and add 2 inches.
Divide that number in half and that will be the width for each of the 2 pieces of your skirt.
If you want your skirt to be more of an A-Line then you’ll want to add a couple more inches to the width.
For the length of your skirt, that’s up to you. I made mine 15 inches long (after all hems and folding.) I have a 3.5 inch fold at the top and 2.5 inch fold at the bottom, plus 15 inches for my skirt length, so I cut my fabric 21 inches long.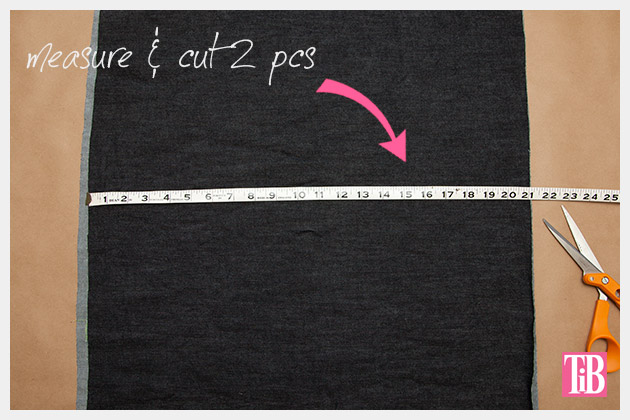
step 2
With the wrong side facing up fold the top edge of your cut fabric over 3.5 inches.
Fold one half inch under to make a clean edge and pin.
Do this for both pieces of your skirt.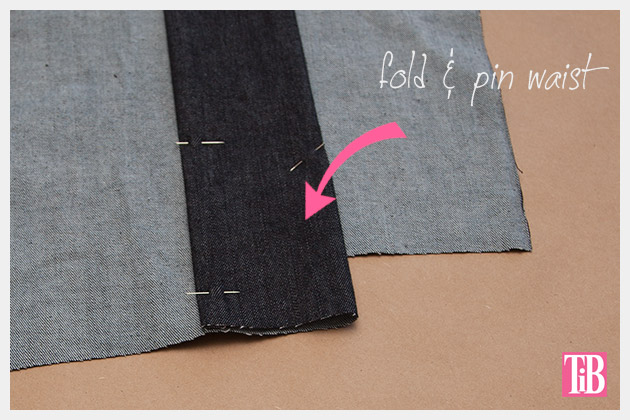
step 3
Using your sewing machine, sew a seam across the top of your fold and also along the edge.
This will give you a nice flat waist to your skirt
Sew both pieces of your skirt.
step 4
Make the same type of fold along the bottom edge only folding 2.5 inches for the bottom hem.
Do this for both pieces of your skirt.
And sew.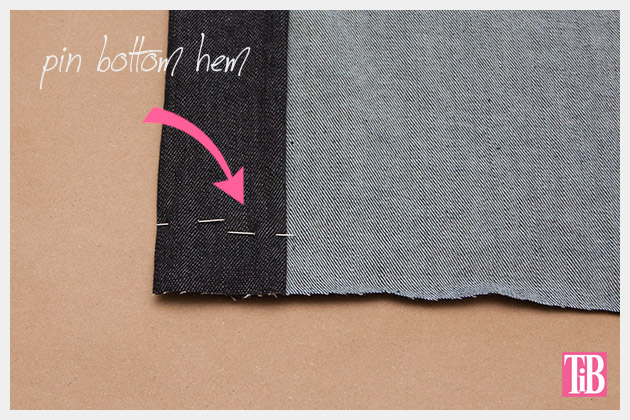
step 5
When you have both the top and bottom of your skirt sewn, with right sides facing, pin it around you to create the side seams.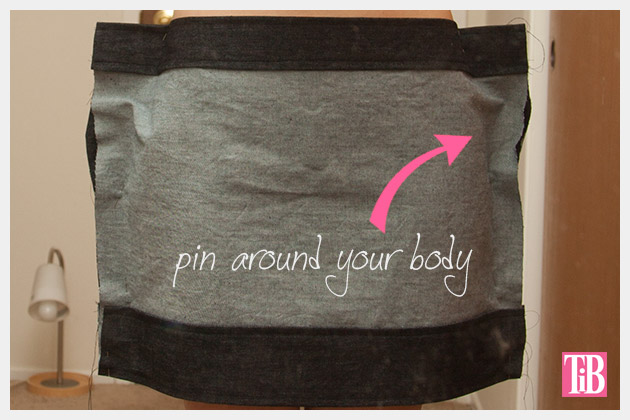
Keep adjusting and making sure that your seams are equal and exactly the way you want them.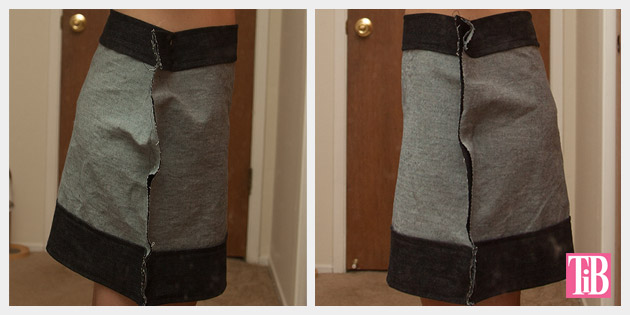
step 6
Sew both your side seams.
Don’t panic we’ll get to the zipper next.
step 7
Before trimming your extra fabric around your side seams, we’re going to add the zipper.
Choose which side you want your zipper on, I put mine on the left.
Lay your skirt out with that seam facing up.
Flatten the seam and place your zipper face down on top of your open seam.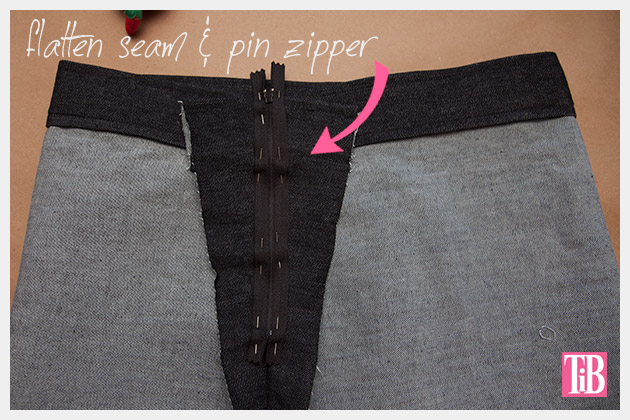
Make sure that your zipper is matched up with the seam and not crooked and also make sure that the head of your zipper is below the top of your skirt.
Pin your zipper in place.
step 8
If you have a zipper foot on your sewing machine, I recommend that you use it for this, otherwise just go carefully.
Sew all the way around your zipper.
step 9
Using either a seam ripper or pointy scissors, carefully rip out the part of your seam in front of your zipper.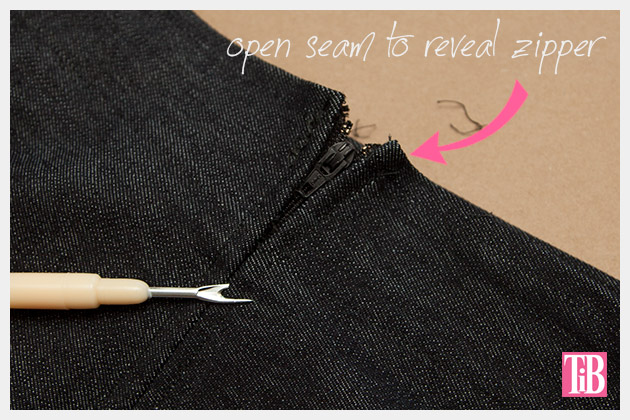
Clean up any loose threads.
At this point you’ll want to try on your skirt to double check the fit.
If everything is good, trim your side seams.
step 10
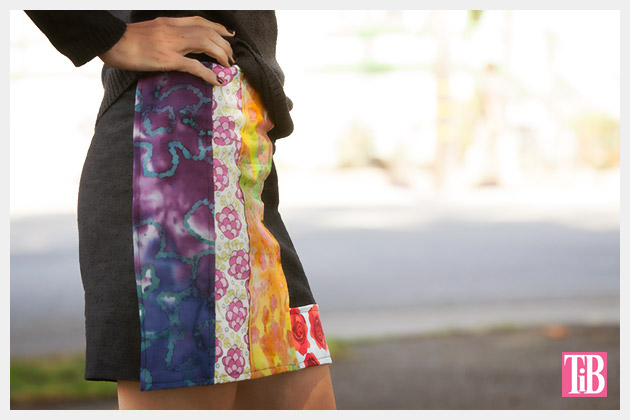
Lay your skirt out flat and place your printed fabrics on top, deciding how you want to patch up your skirt,
I made a band across the bottom and three stripes down one side.
When you have your design, trim your fabrics and pin them in place.
step 11
Starting with the bottom layers of your patches, sew them to your skirt, until you have sewn all layers to your skirt.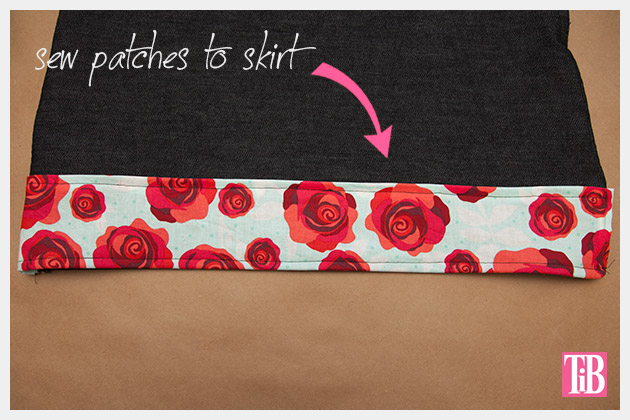
Trim any extra threads and you’re ready to rock it!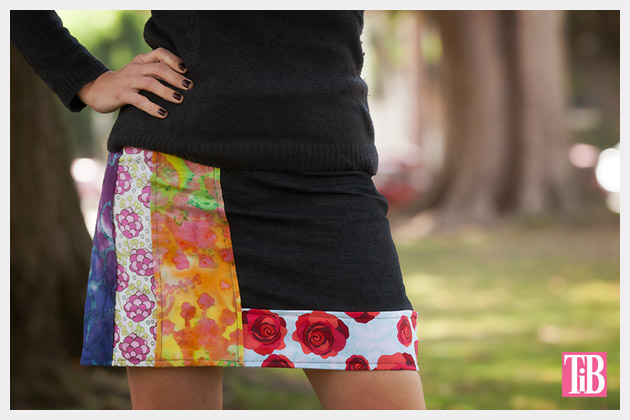
I love mixing up lots of colors and patterns together, this is a really fun skirt that I’m sure will get lots of wear this fall with tights and boots.
Don’t forget to enter the JoAnn Sew Your Style contest! Good luck!
This is a sponsored post. I have been compensated for this post, however all opinions, tutorial and ideas are my own.
I love it!! I’ve got a Craft Gossip post scheduled for tomorrow that links to your tutorial:
http://sewing.craftgossip.com/tutorial-diy-patched-skirt/2014/09/18/
–Anne
Thank you so much for sharing it Anne! I can’t wait to see your post!
xoxo
Cathy
Отличная идея по вшиванию застёжки молнии. Спасибо, обязательно воспользуюсь.
I really love this idea, it looks fantastic ! Thank you so much for sharing your idea, I’m definitely going to try this one out :)