
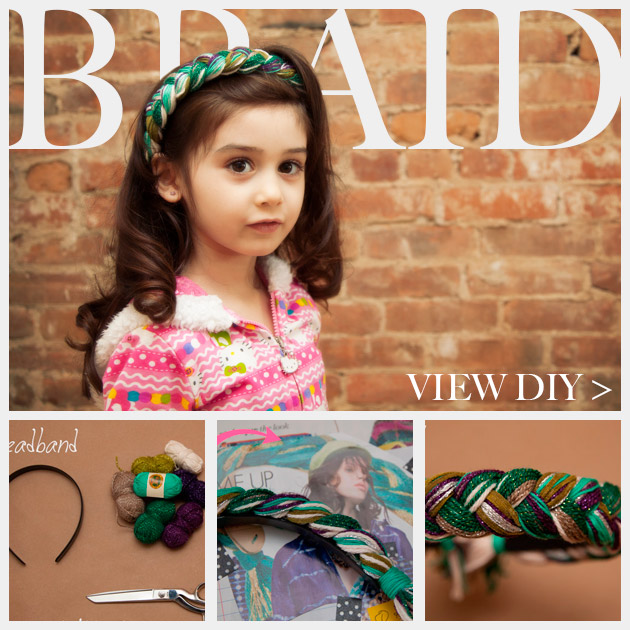
Use up your leftover yarns to make this cute and on trend DIY Braided Headband.
MAKE A BRAID >
Just in case you needed an alternative to flowers for Coachella this weekend, you can always rock a braid!
My inspiration was this headband by Aurélie Bidermann.
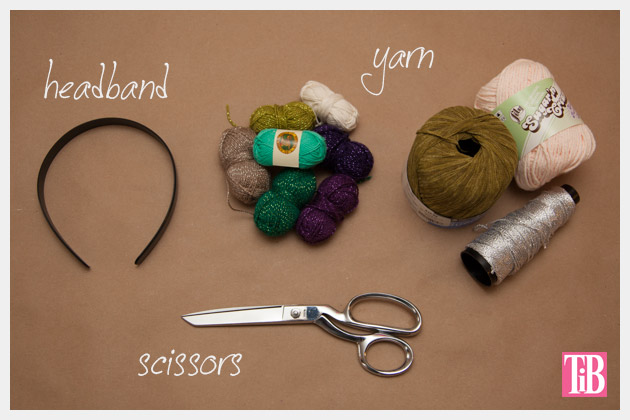
TOOLS & MATERIALS:
- Headband
- Yarn
- Scissors
- Hot glue
step 1
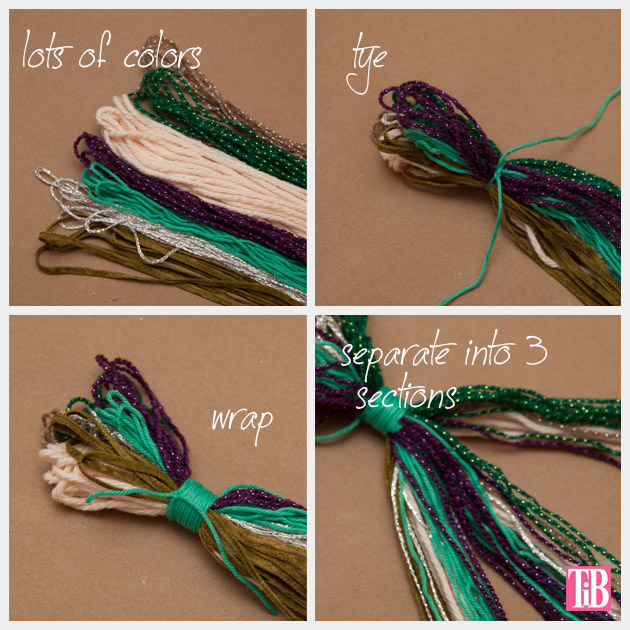
You’ll want to use a lot of yarn for this project to make your braid nice and thick.
Measure out your yarn to be twice as long as your headband.
I didn’t count how many lengths of each color that I made, I wanted it to be a bit random and I was just using up colors that I had.
step 2
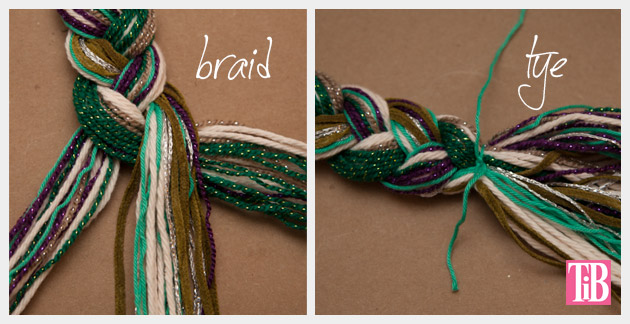
Take one of your colors of yarn and tye a knot around the end of all your yarns.
Tye it tight.
Then wrap your yarn around the yarns several times.
I did this until it was about a half inch wide.
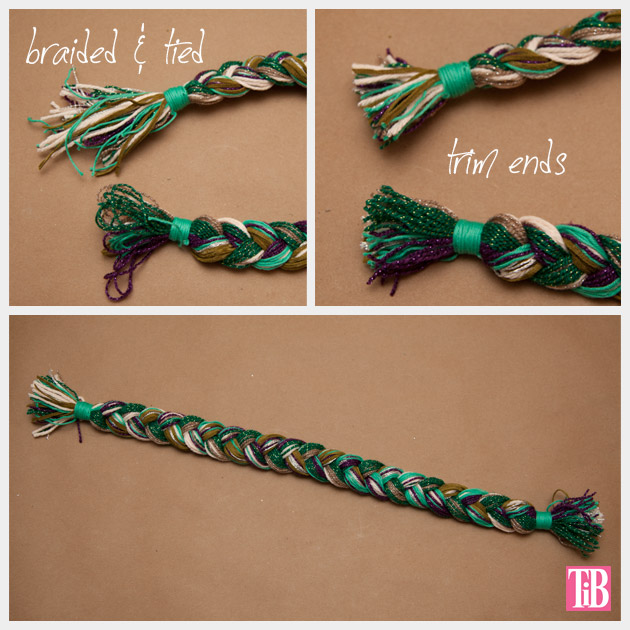
When you are done tye your end in a knot with one of your ends from your bunch of yarns.
step 3
Separate your yarns into three equal sections and braid.
As you braid, keep checking your braid against your headband to check your length.
When your braid is as long as your headband, wrap your end the same way you did at the beginning and knot the end.
step 4
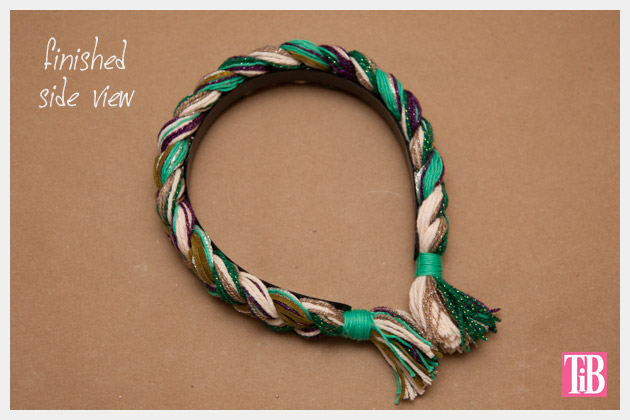
Once your braid is finished and both your ends are tied, trim your ends to make them equal.
step 5
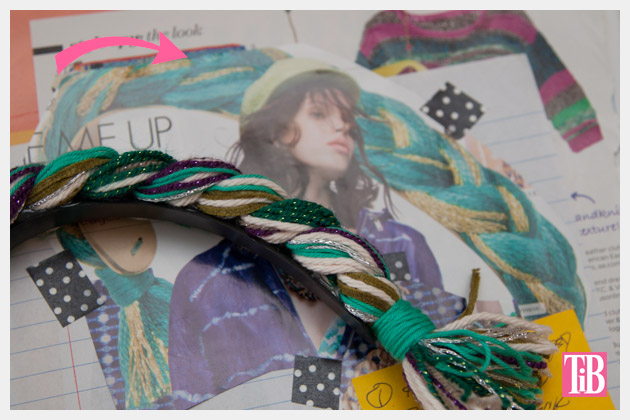
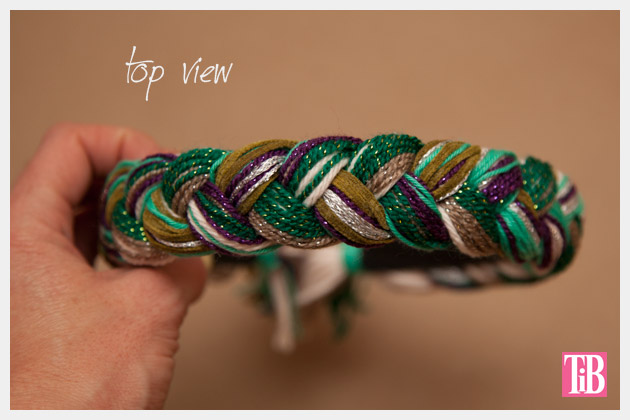
Using your hot glue gun, add small amounts of hot glue to your headband and attach your braid.
TIP: Do this slowly in two to three inch sections. This will help you to check to make sure your braid is straight and it will also keep your glue from running or dripping and potentially burning you.
Let your glue dry and you’re ready to go!

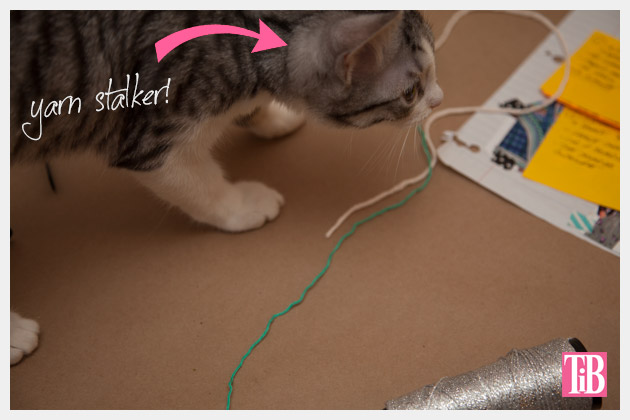
Ever since we got our new kitten, making projects has been a whole new experience. (For me and her.) The constant temptation of beads, yarn and all those other fun materials keep her busy stalking those crazy things!
This is a perfect project to use up all that extra yarn. You can mix colors and textures to create fun and different looks. You could even leave the ends longer or add ribbons. If I’d known I was making it for my daughter:
1- I would have used pinks, of course!
2- I probably would have left the ends long and added lots of sparkly ribbons. Next time!
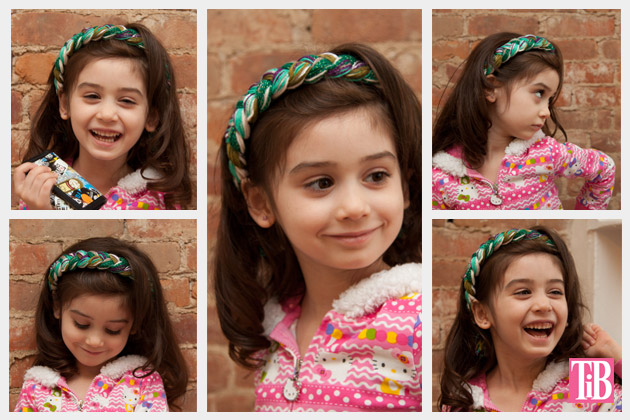
I definitely had a different vision of this project when I first set out to make it. When it was finished I just really didn’t do it justice, however I my daughters long dark hair was just perfect! And, she was just so excited to model for mommy’s blog! So here’s my shameless excuse (I’m a mom, what can I say?) to show you just how cute she is and how she modeled this headband way better than I ever could have.
Have a wonderful weekend!
SO CUTE!! I love it! I’m making one of these for my niece.
Thank you so much Sarah!
xoxo
Cathy
it’s beautiful, I’ll be making a couple of these for my granddaughter and niece’s they are going to love them .
.
Thank you so much Lourdes!
xoxo
Cathy