
With bold geometric patterns and bright colors this DIY Plastic Canvas Clutch will hold all your necessities and look great doing it, for less than $7.

MORE FANTASTIC PLASTIC >
A fun and slightly preppy look with a bit of retro chic, this DIY Plastic Canvas Clutch will update your look for spring.
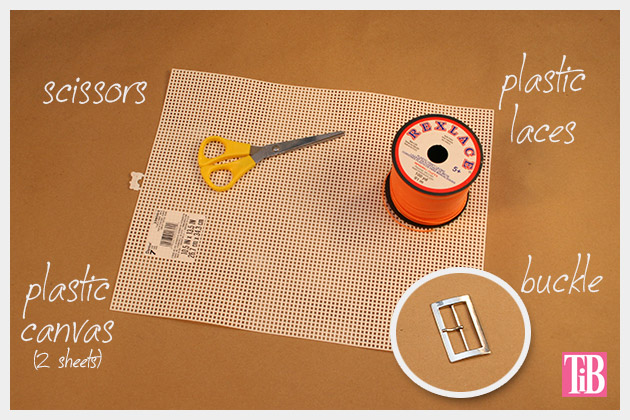
TOOLS & MATERIALS:
- 2 Sheets of plastic canvas (I used 7 mesh – you can buy it at JoAnns)
- 1 100yd Spool of plastic lace (You can find it here)
- Scissors
- Buckle (similar here)
step 1
Cut a long length of your plastic lace and starting in the bottom lefthand corner begin sewing your pattern.
Leave about a two inch tail on your plastic lace when you begin, as you sew cover this tail end with your stitches on the back side. This will keep your work clean and also easily hide your ends.
You can see this in the photos.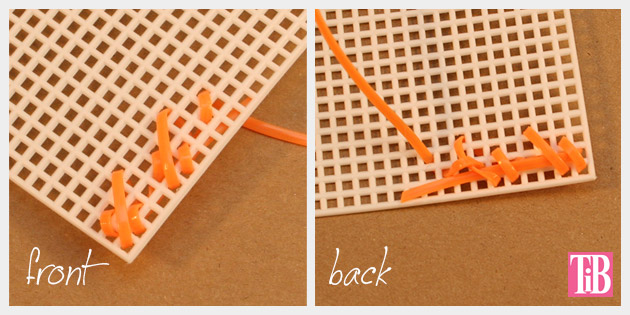
TIP: I recommend using a lace long enough to sew one row of your pattern. Then each time you start a new lace you will start a new row on the lefthand side. This will help to keep your stitches and rows uniform and neat.
step 2
Continue sewing your pattern across your canvas until you have filled two thirds of your canvas.
By leaving one third of your canvas open it will create a cleaner look when your clutch is finished.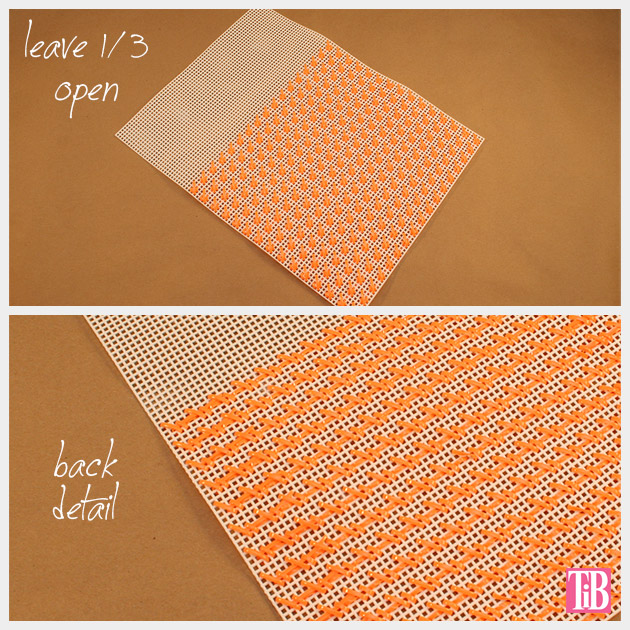
step 3
When you are finished with your pattern, you are ready to fold and sew your sides.
Fold the part of your canvas that has no stitching on it toward the center of your canvas, as if you were going to fold it in thirds. (wrong sides together)
Using your plastic lace sew your side seams together. I used a simple whip stitch, you can see in the photos.
step 4
Once your sides are sewn together continue sewing the same way around the open edge of your bag, the part that will be your flap.
This will create a nice clean edge.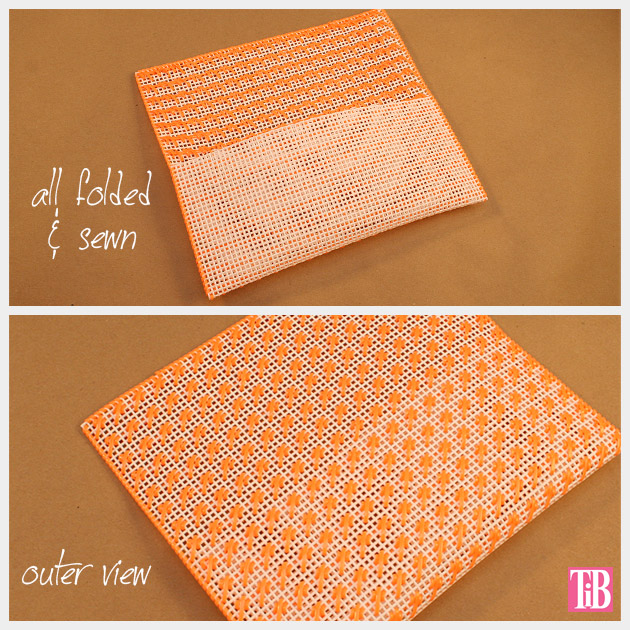
step 5
Creating the strap.
Cut a strip of your plastic canvas the length of the long side of your sheet of plastic canvas.
Compare it to your buckle to make sure it will fit, give yourself a little extra room, since you will be sewing around the edges and this might make it a little wider.
step 6
Start sewing your pattern on your strap.
Once your strap is all sewn you are ready to attach it to your clutch.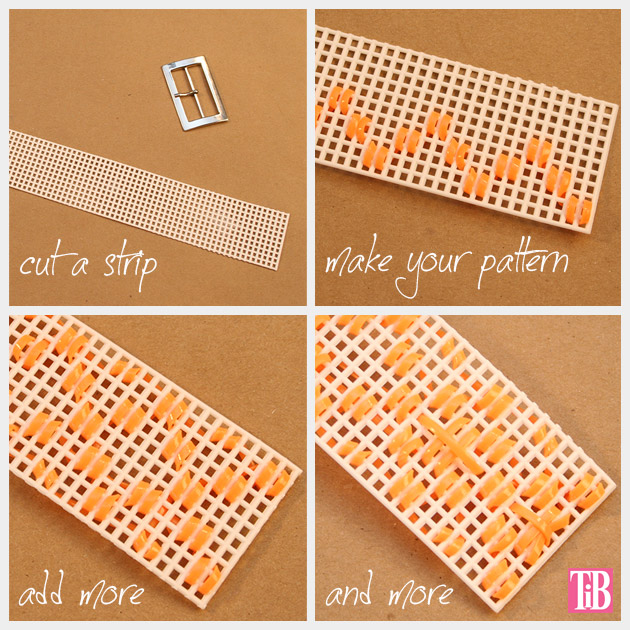
step 7
Before you add your strap to your clutch you need to add your buckle.
On the front side of your clutch, on the part with no sewing as close to the bottom as possible, place your buckle in the center.
Using your plastic lace, start from the inside of your bag and sew your buckle securely to your bag.
TIP: Because of the thickness of the strap I used my pliers and removed the pin on the buckle. This made it much easier to open and close and because the strap is so thick it still holds really well.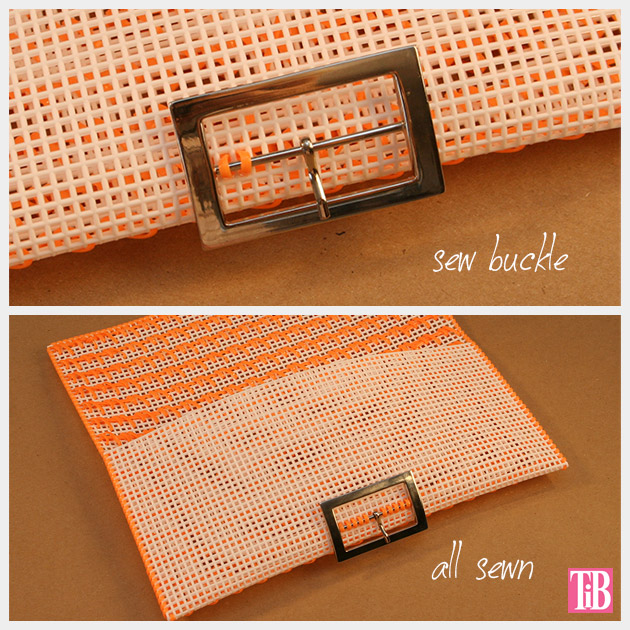
step 8
Turn your clutch over so you are looking at the back side.
Place your strap in the center of your clutch, with the end right at the bottom of your clutch.
Use your plastic lace to sew it tightly to your clutch.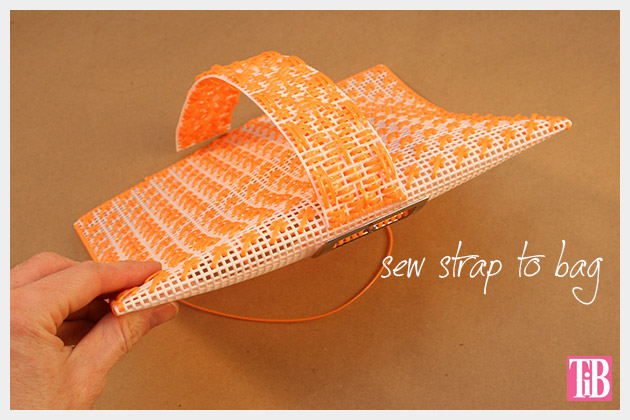
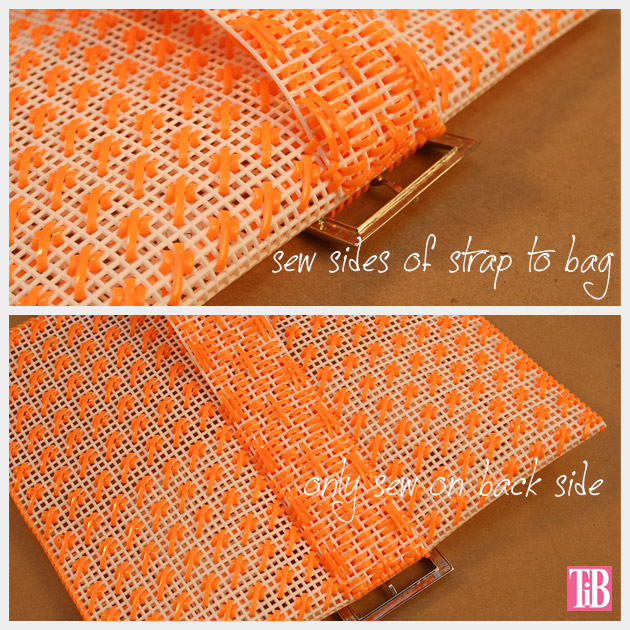
TIP: Only sew your strap to your clutch on the back side, stop a little before you get to the point where your flap will fold over. Otherwise your clutch will be a little too stiff and difficult to fold over.
step 9
Once your strap is sewn to your clutch, sew around the open edge of your strap, to finish it.
Buckle your clutch and youre done!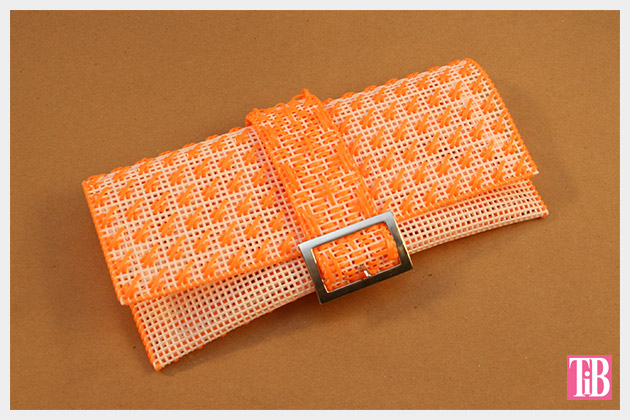
This functional and cute DIY Plastic Canvas Clutch is right on cue for spring. The simple retro styling and playful pattern in bright colors make the perfect clutch.
This project is fun for kids or adults. Because this clutch uses plastic laces you dont need to use a needle, which makes it a great project to take with you to work on the go.
Cathy this is absolutely incredible! Fabulous job, so unique and so well done!
xx
Lia
Smart n Snazzy
Thanks Lia!
xoxo
Cathy
you’re awesome!
Genius! Simply Brilliant. I can make all kinds of colors for various outfits! Thank you.
I love your ideas and projects very much, and will try some of them.