
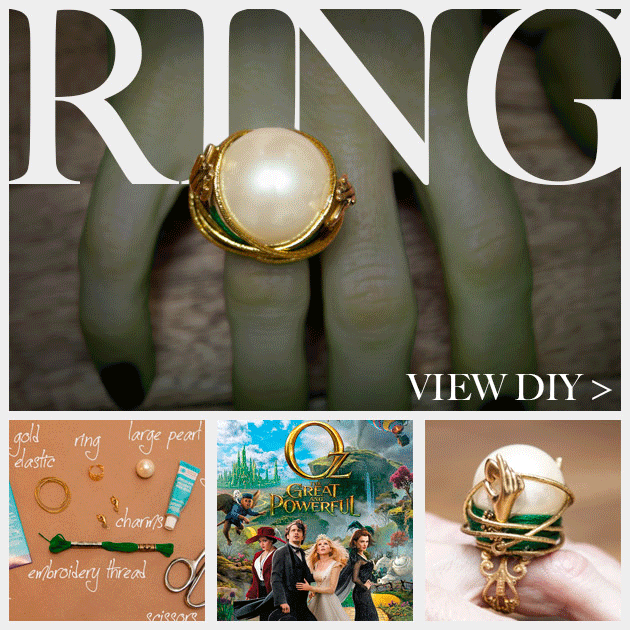
If you were to travel to OZ, what kind of jewelry would be useful to have with you? Why, a DIY Crystal Ball Ring of course! What better and more stylish way to see what the wicked witch is up to and to get a heads up when flying baboons are on their way!
This DIY post has been made to announce the release of the ’Blu-Ray Combo Pack’ for Disney’s ‘Oz The Great and Powerful’. I have been compensated for this post, however all opinions are truthful and my own.
LET’S TRAVEL TO OZ >
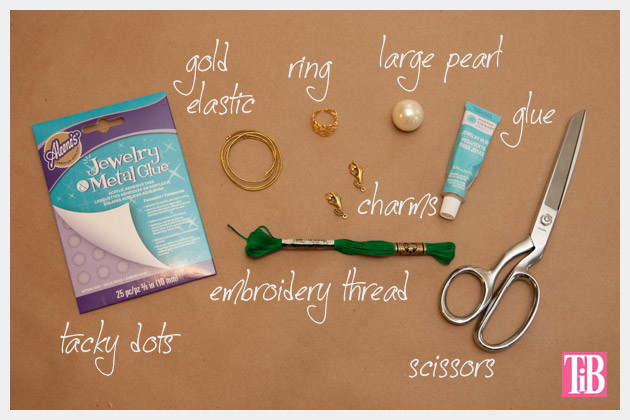
TOOLS & MATERIALS:
- Ring base
- Large pearl
- 2 Small hand charms
- Emerald green embroidery floss
- Gold elastic
- Glue
- Aleene’s jewelry tacky dots
step 1
I used the Aleene’s tacky dots to hold the large pearl to the ring base and to hold the small hand charms on either side of the large pearl. These tacky dots will form a permanent bond, however since this is a ring I really want to make sure nothing comes loose, so I also glued everything in place.
The tacky dots just really helped me to see the placement and keep everything from moving while I was trying to glue it.
step 2
Once you have everything placed where you want it, add more glue to make sure they hold well.
Let dry.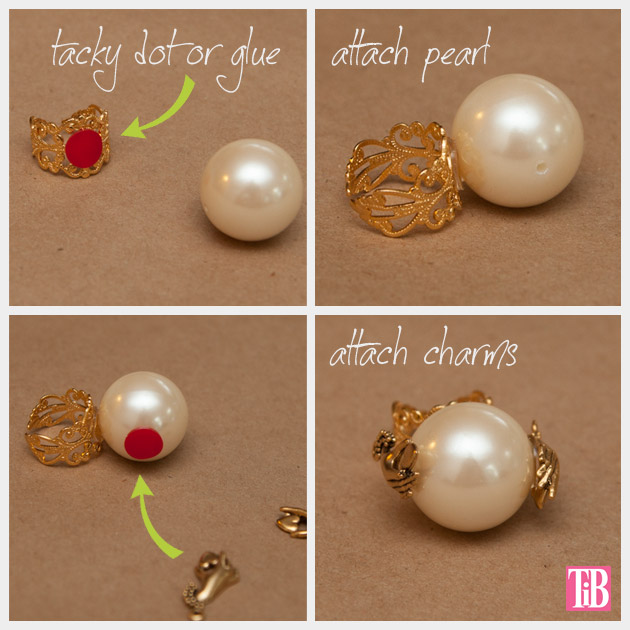
step 3
Add a small amount of glue at the base of the large pearl and place the end of your emerald green embroidery floss in the glue.
Wrap your embroidery floss around the base of the large pearl.
Add glue here and there as you wrap to keep your embroidery floss in place.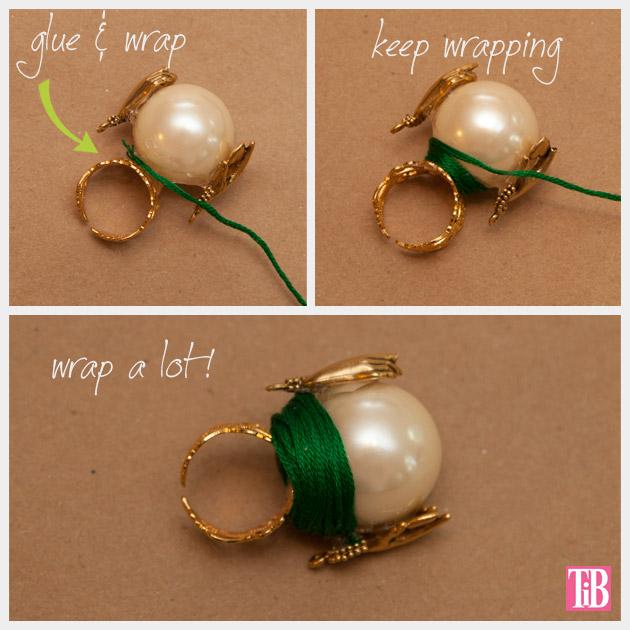
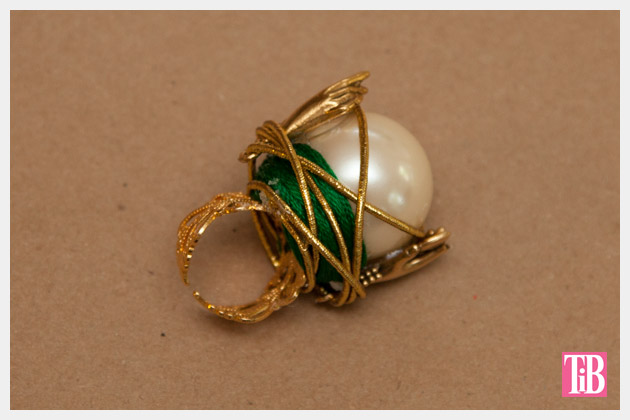
step 4
Add a small amount of glue to the base of the ring and secure the end of the gold elastic.
Once the glue is dry enough to hold, start wrapping your gold elastic around the entire ring.
When you’ve wrapped it as many times as you want, secure the end with glue and trim.
Let the glue dry.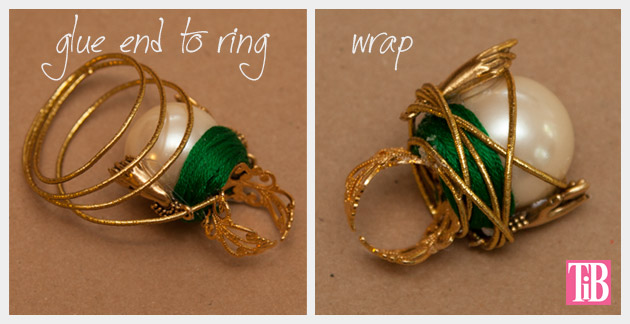
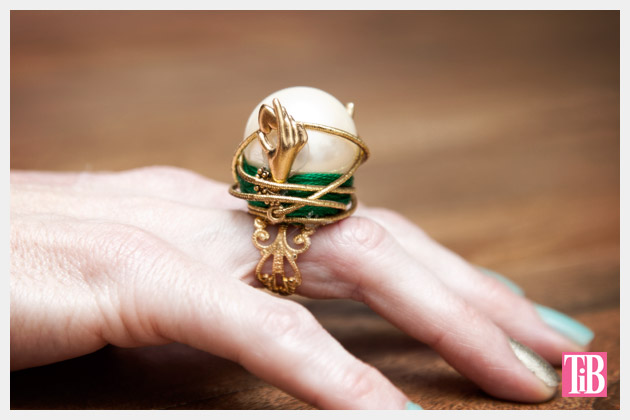
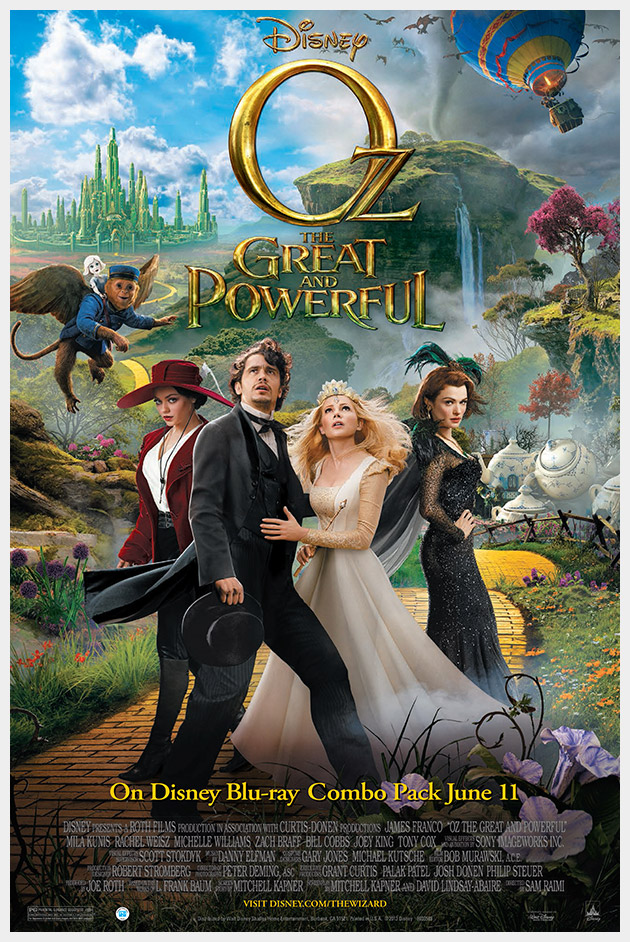
This was a really fun way to create a DIY. The project we were given was to watch the movie ’OZ the Great and Powerful’ and create a DIY project inspired by the movie. I honestly did like the movie, it was fun and entertaining. My daughter is five and it’s not that often that I get to watch something that isn’t animated! She also watched this movie too, it was a bit scary for her but, beautiful ’princess looking’ witches were enough to keep her interested and of course the china doll, she is a very cute character!
The costumes in the movie really could’ve been more elaborate, just my opinion, with more accessories! But, that’s just me and if you read my blog regularly then you know how much I LOVE accessories and embellishments. So, that’s why I created this DIY Crystal Ball Ring!
Please leave me a comment and let me know how yours turns out!
For more information about the movie check out their social media:
Facebook: https://www.facebook.com/OzTheGreatAndPowerful
Twitter: https://twitter.com/DisneyOzMovie
Pinterest: http://pinterest.com/disneystudios/oz-the-great-and-powerful/
For more information on OZ The Great and Powerful or where you can purchase the BluRay Combo Pack.
See what other bloggers were inspired to make:
Killer job, Cathy! I love this ring, and the top image is fabulous ;-)
xo
Lia
Thank you so much Lia! I had a lot of fun doing it! :)
xoxo
Cathy
This is awesome! Where did you get the neat little hand charms?
Thanks Georgia!
I bought the hand charms here http://www.beadcenterny.com/charmcollection/# they are charm #197 Unfortunately if you order online they have a large minimum, however Michael’s has a lot of charms and jewelry supplies, that may have something similar.
xoxo
Cathy
This is so clever! Do those tacky dots hold up well?
Thanks Maggie! Yes, they do. I was surprised, the longer they are on the stronger the bond. I thought I would be able to peel them off and re-stick them but they were holding very well. But it is a more flexible hold, that’s why the glue helps to keep it more stiff.
xoxo
Cathy
Very cute! I love it so much!
Liz
Thanks Liz!
xoxo
Cathy
looking great! it actually looks like they have some kind of a magic!
Hee hee, I love the animated gif at the top! Brilliant. This ring is gorgeous~!
bello bello
eres increíble éxitos ;)