
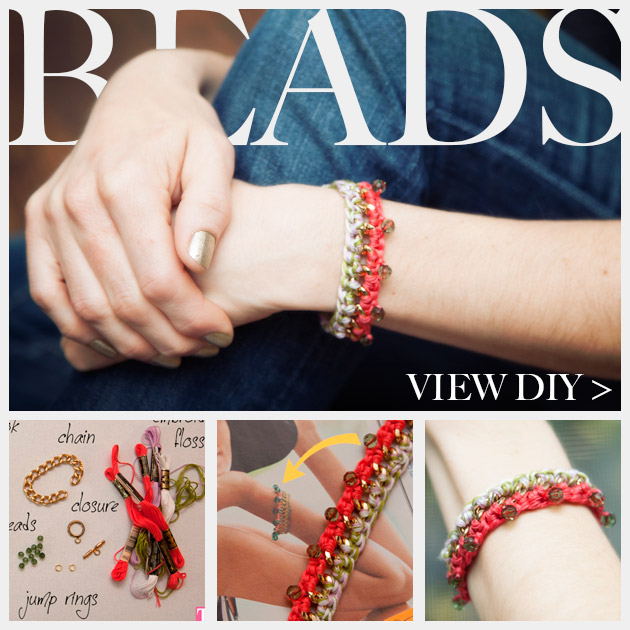
Mixing up colors and textures creates this fun DIY Crochet Beaded Bracelet.
GET CROCHETING >
My inspiration to make this bracelet came from this photo in the May Lucky magazine. The mix of bright colors, beads and gold chain make this a fun bracelet for spring or summer.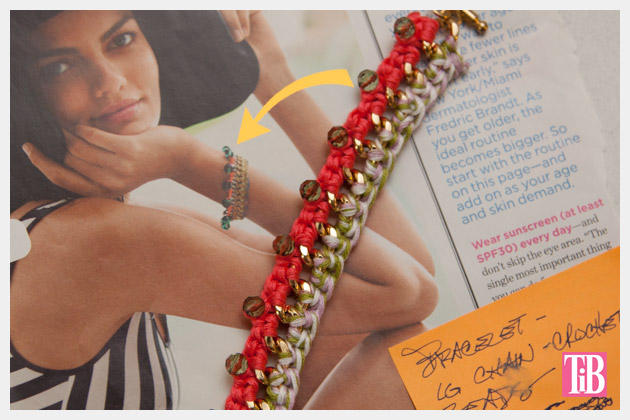
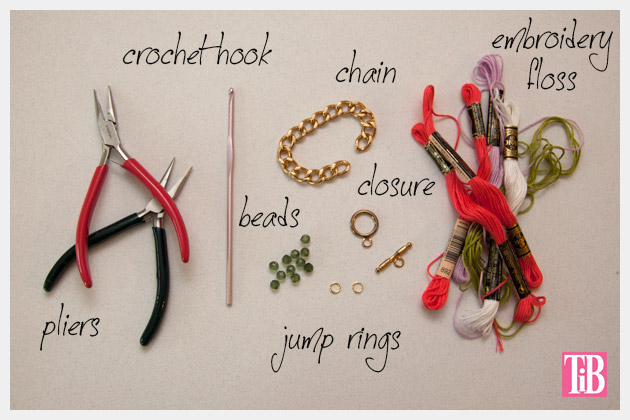
TOOLS & MATERIALS:
- Large chain
- Closure
- Jump rings
- Embroidery floss
- Crochet hook
- Beads
- Pliers
- Scissors
- Needle (to sew in ends)
- Beading needle
Check out my Amazon shop for links to all supplies.
step 1
Measure your chain to your wrist. Remember that your closure and jump rings will add length to your bracelet. I cut my chain just a little shorter than my wrist measurement.
Add your closure to your chain using your jump rings.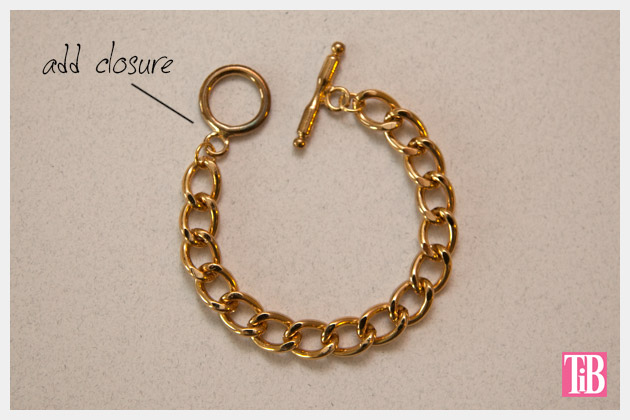
step 2
Starting with the colors you will use for your first side make your first knot on your crochet hook. See the image below.
For this first side you will make single crochets in the links of your chain.
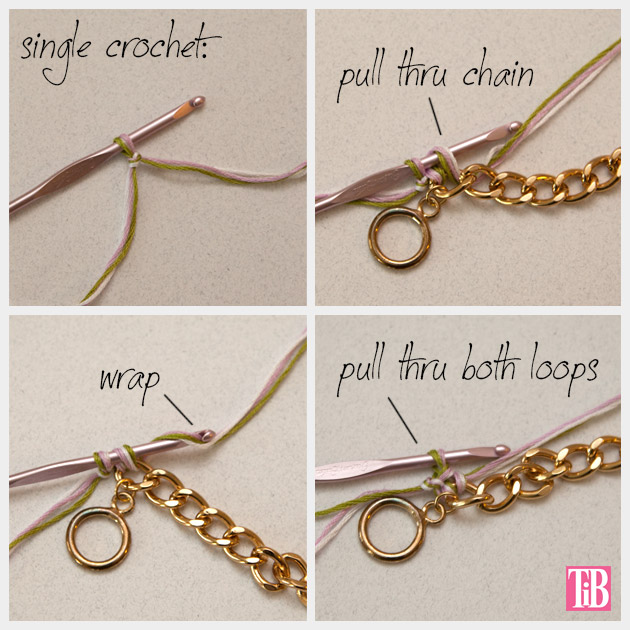 I did 2 single crochets in the first link, then 1 in the next, then 2 in the next and continued in this pattern all the way across the first side of my bracelet.
When you get to the end of your first side, cut your yarn leaving about 4 inches, wrap your yarn around your your crochet hook and pull it all the way through your loop, pull it tight. This is your end knot.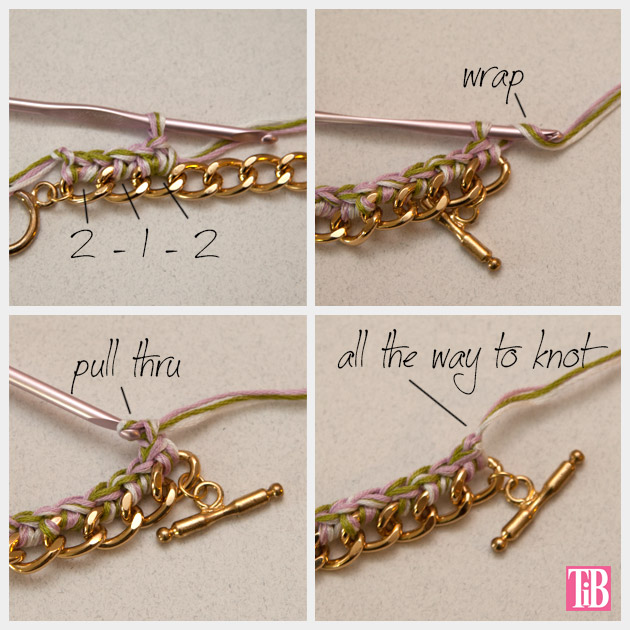
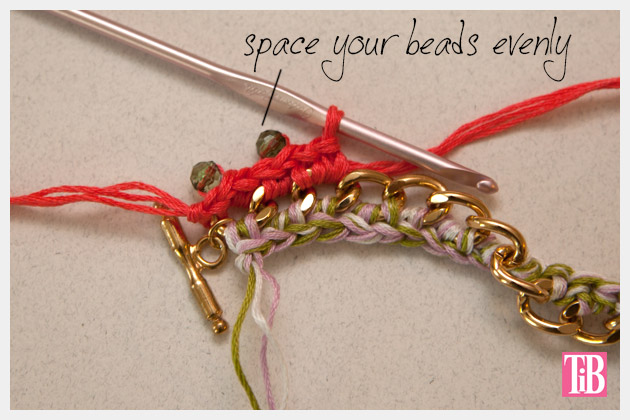
step 3
Layout your beads by your bracelet to decide how many beads you will need and how far apart to space them.
I laid out 10 but ended up using only 8.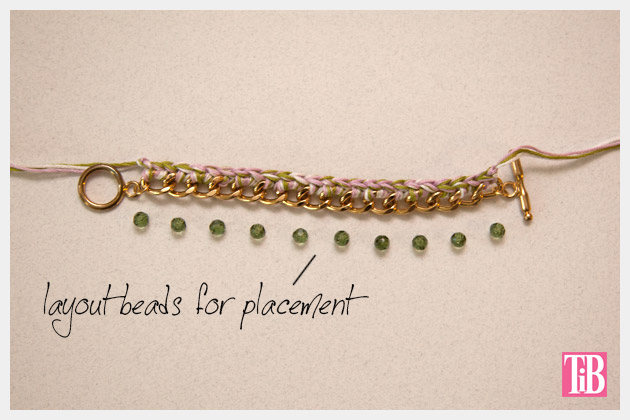
step 4
Using a beading needle string your beads onto one strand of embroidery floss.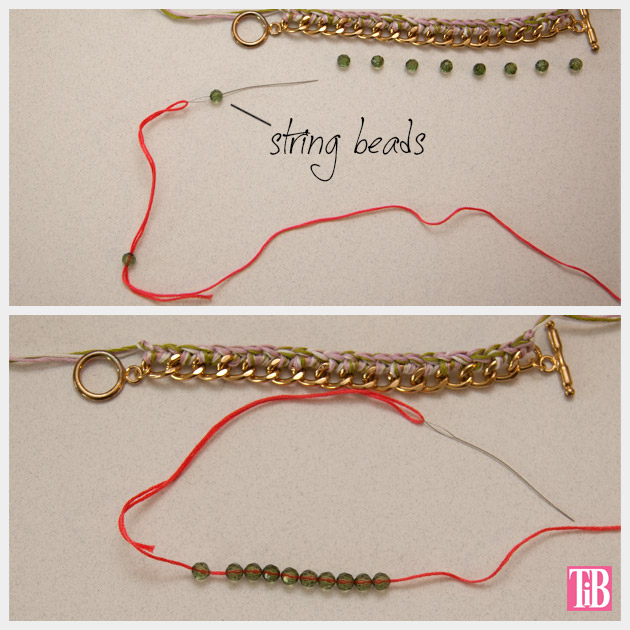
step 5
To crochet the second side I used 3 strands of embroidery floss (including the one with the beads strung on it).
To begin crocheting this second side you will start the same as you did for the first side, with a knot on your crochet hook.
Then pulling your yarn through the first link on your chain to make your single crochet.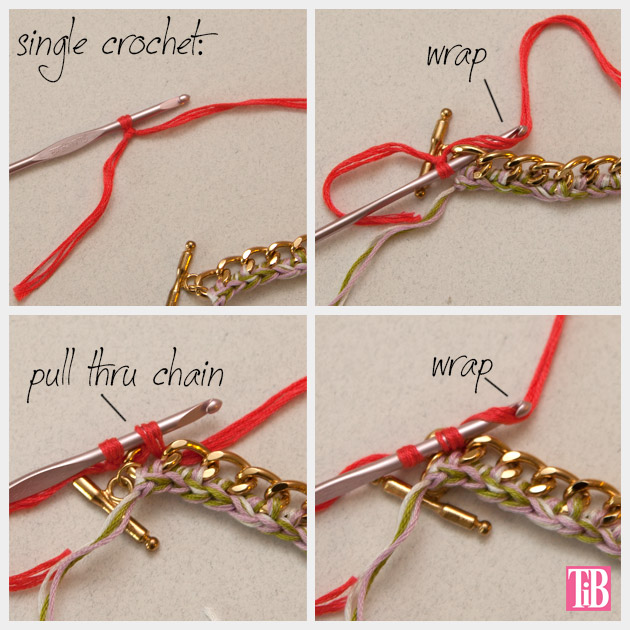 I did 2 single crochets in the first link, then I pushed my first bead down near my crochet hook, wrapped the yarn around the hook and chained one.
Make one single crochet in the next link of your chain, 2 single crochets in the link after that, then move another bead down to your crochet hook and make a chain stitch. Repeat all the way across your bracelet.
 When you get to the end, cut your yarn and pull it through your last loop the same as you did on the first side to knot it.
step 6
Using a yarn needle sew in your ends.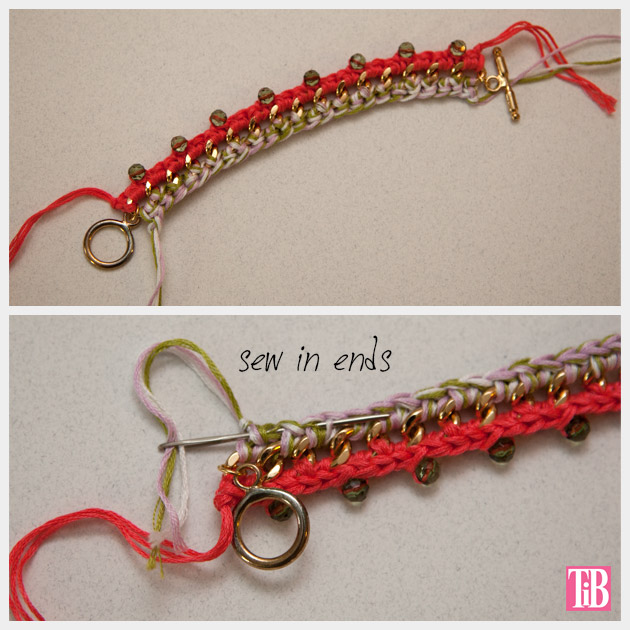

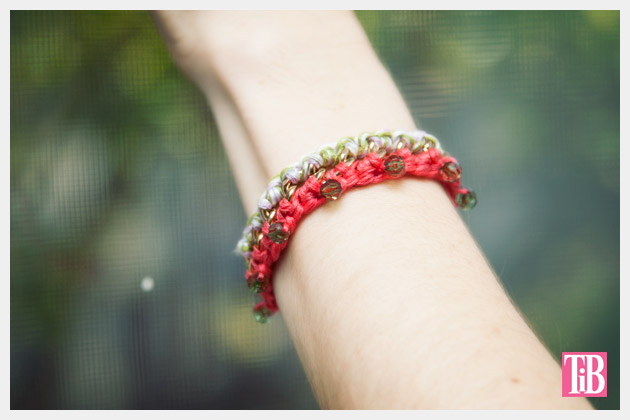 Making DIY bracelets is just so much fun and so quick (usually) to do. They make great gifts and you can always find one for any occasion or season.
For more DIY bracelet ideas check out this page.
What are some of your favorite DIY bracelets? What materials would you like to see used in a bracelet? Leave me a comment and let me know.
This looks lovely!
Your ideas are so awesome, and it inspired me a lot to build my own business out of the ideas… Thank you so much!!!